


Wednesday, November 5, 2008
Parking Dash Tips & Tricks
Here are some hints that I found useful in trying to hit expert on all the levels or Parking Dash. Good luck! If there are any tips that I missed, please feel free to add them in the comments!Basic strategy:
- Cars can ONLY be placed in the exit spot when their driver is there to claim it.
- You can move and repark cars in different spots to get at a car that is parked deeper in the lot.
- Every time you park a car in a spot, the space turns the same color as that car, and a number appears. This is the number of times you parked a car the same color in that spot. Parking a car on the same colored spot gives you a bonus and is an important key to winning the game.
- Each time you park a same colored car in that space, the multiplier increases (up to 5x).
- Color matching only counts when parking a car the first time. Moving a car from one spot to another *does not* affect the multiplier bonus.
- The radio station can give Karma a power boost when you listen to a station she likes. Turn the station when the green light starts to flash. If you're having difficulty managing everything, this should probably be your last priority!
Getting the car:
- Notice the clock over the customer's head. Park the cars in the back of the lot for the people who have the most full clocks (i.e. completely blue circle). Make sure to park these keys first.
- Conversely, park the cars with the least amount of time close to the back and exit.
- Keep in mind that you can always change which customer's car you want to park by clicking on a different person.
- When you have a large group of people waiting to park, feed them a vending machine snack to improve their patience; when they return to get their car, they will have more hearts.
Parking:
- (This took me a while to figure out!) You can park a car in the same colored spot to get a bonus, then move it immediately to a different space. That way, you get the bonus and can better manage the spots available on the lot. This is a good technique to use for the later levels that need a lot of points to progress.
- When parking cars, if you can park the same color in a same line (row) or side-by-side (column), it can make it easier to score point bonuses.
- If you have two of the same colors in a row/line, if you park the same color of limo, float, or SUV on those spots, you get a DOUBLE (or TRIPLE) bonus.
- Park SUV cars of the same color side by side to get a double bonus.
- If there is trash on the group, entrance, or a parking spot, you must clean it up before you can drive through it.
Reserved spots:
- A blue and white sign means that spot has been reserved. Drivers with reservations will only park in those spots.
- You can park the car in the reservation slot, then move it afterwards. However, if you do keep it in the reserved slot until the driver comes back, you get an extra tip.
- You can park cars in the reserved spot (that weren't meant for that spot), but move them as soon as a reserved car shows up. This is one way to set up a bonus for the reserved spot.
Driver pick-up:
- Do whatever you can to keep the customer from being angry when they leave. If they leave angry, you lose money.
- Give the donuts to the customers to make them happier.
- If there are too many customers waiting to park (you have no more spots available), deliver all the cars to the drivers waiting for pickup.
- Each customer drives a specific type of car. Knowing which car type belongs to a driver helps to maximize your time. (You can always click on the returned driver to see what car, but it takes time!) This is especially important when dealing with the love-sick man, whose car does NOT show up when you click on him.
- If you're really panicked, just pull out any car. If it doesn't go to the exit, repark and move to the next car. On later levels, it may take too much time to click on each customer individually to figure out which car is theirs.
- When you have a large group of drivers waiting to pick up their cars, feed them a vending machine snack to improve their patience; you'll get more tips.
Other:
- Try to wash all the dirty cars at the same time because you get a bonus for repeating the action.
- Once Jimmy is working for you (level 24), create a chain of car cleaning for
him by clicking him, then the cars to clean. (But pay attention to the length of time they are parked - make sure he washes the cars with the shortest time first!)
- If you're having difficulty finishing a level, try not filling all of the parking spots - that way you have an empty spot where you can move a car. Also keep in mind that if you fail a level, you can repick an upgrade - it might be worth trying a different upgrade for that level.
- Make sure to clean any debris (sand, leaves, moon dust, snow) as soon as it appears, because cars will not be able to drive through.
Customers and their cars:
Teenage girls: "Bug" car. Average speed car, patience, tippers.
Business women: Sedan style care. Fast car speed, not patient, and good tippers.
Celebrities: Stretch limo: takes up 2 spaces in the same line. Average speed, low patience, excellent tippers.
Cell-phone guy: Sports car. Sometimes the alarm goes off. Kick it to
shut it off, or it will annoy the waiting customers. NEVER park this car on a lift because you can't shut it off. Fast cars, extremely impatient, good tippers.
Al - Fast car, average patience, good tipper.
SUV driver: needs two side-by-side spaces. When possible, park against the wall. Remember to click the spot where the left wheel would go. Slower car, average patience and tipping.
Derek: Average car, driver, tipper.
Auntie Ethel: Impatient, slow car, poor tipper.
Lovestruck man: Very patient, average speed car and tipper.
Parade festival woman: Parade float needs 3 spaces in a row (and apparently
they have a lot of parades!) Slower car, average patience, tipping.
Student: Small, fast car - patient but poor tipper.
Dog owner: Leaves the dog in the car. (I found this one to be the most tricky) If you need to move the car, you have to placate the dog by giving him a treat. DO NOT click on the car again, but instead, click on the spot where you want to move the car. Try to move this car as little as possible, because you have to give the dog a treat every time.
Senior: The senior is the last new customer you'll meet, in level 36. Much patience, very slow car, poor tipper.
On the Moon:
- Be very careful with the dog owner's car. You must park it against a wall, because there are no dog treats for the first several levels.
- A new upgrade, the nitrogen tank will appear. It makes cars move faster. Click on the tank, then on the car to move. This is especially useful on the Senior and Aunt Ethel's car. Unlike other items in this game, you can't chain the nitro tank - you must click the tank then the car every time you want to use the tank.
- A cool new way to move cars: you can swap them by clicking! This allows immediate access to cars without having to drive from one spot to the other.
Upgrades:
There are 3 types of upgrade. Speed: lot (upgrading the pavement, adding cones, etc), Karma (upgraded shoes) or equipment (faster moving car lift or nitro tank). Tips: improving the look of the lot increases tips. Patience: Certain aesthetics also improve patience. I found these to be most useful in later levels, especially in the more difficult locations. All upgrades are automatic and presented as choices to you; none have to be purchased.
Hope this is helpful - and happy playing!
Tuesday, October 28, 2008
Parking Dash
Parking Dash, a new time management game from PlayFirst, the makers of Diner Dash, Flo on the Go, and Cooking Dash, is a fun and enjoyable game.You're Karma, a friend of Flo (famous heroine of the Diner Dash and Cooking Dash series), who inherits a parking lot (luckily) behind Flo's Diner. Flo encourages your entrepreneurial skills and to run a valet service instead of selling the lot.
There are some interesting twists to the time management aspect. As each customer appears, a timer is over their head. This lets you know how long they want to park. Since some spaces can blocked in, it's important to strategically place the cars that will be there the longest in those spots (and then to remember which ones will be there the longest!) Karma must keep the customers happy by picking up and delivering the car on time as well as managing the parking lot space limitations.
Play style is different from many of the dash games - more on that in a tip post to follow. There are bonuses to placing the same color car on a similar colored spot (just like sitting diners in the same color of chair). The cast of characters is the same from the dash games and have the same sort of temperaments. The businesswomen are still the most impatient. As the game progresses, there are upgrades that help improve the appearance of the lot, increasing either tip or patience level. I thought it was pretty funny to have a donut upgrade to help improve driver patience. Bonus points are scored by performing a series of events (parking cars, delivering cars, washing cars). The happiness of the customer is designated by their face. Big grin: happy. Small smile: content. Unhappy: red. Upgrades are choices at the beginning of levels and do not have to be purchased.
Graphics are very similar to other Dash games. I did love how the "bug" style cars have a little purple heart on top.
There is a radio station that plays music and you can change the channels a la Grand Theft Auto. This has no bearing on the satisfaction of the customers, but is a welcome addition to listening to the same music over and over. It does add a boost of speed for Karma, and can add to the hectic pace of some of the later levels.
What they did well: As in many of the Dash games, you get to see familiar faces - like Flo and Quinn (from Wedding Dash). The puzzle piece of placing the cars in a way that is accessible is a nice and different twist on time management games. Again, having the radio station dials is also an improvement over the same music.
What could have been better: The upgrades were not very compelling, and there weren't achievements to unlock. Not having hearts to show the happiness of the customers is such a different take for the Dash games, I found it a little difficult to know when a customer was just content vs bordering on angry. Sometimes the only "hint" was the sound of tires peeling out of the lot and then the -100 flashing on the screen.
It is a challenging time management game that both new players and veteran “Dash” fans will enjoy.
Recommended for: kids, fans of the Dash series or time management games
Saturday, October 18, 2008
Time Stand Still - walkthrough under construction
I'm still working on solving the Time Stand Still game. However, I'm submitting my current walk-thru. Updates to come very soon.Home:
1.) Go to the kitchen.
2.) Read the newspaper.
3.) Locate the telephone book on the chair.
4.) Open it and find the address for SOLVIG LIEDBERG.
Kiosk:
1.) Start talking to STINA.
2.) Look at your notepad to ask Stina questions.
3.) Watch the ads Stina shows after the interview.
Katarina's home:
1.) Open the door to enter.
2.) Use the notepad to ask her questions.
3.) After asking all the questions, leave the apartment.
4.) Go to the SOLVIG LIEDBER home.
Solvig's home:
1.) Interview Solvig. She will give you house keys. These keys will be used later - enter the home when it is empty.
3.) Go to the rear door to find the hissing sound, which is coming from the radiator. You will be unable to repair it because you need a key.
4.) Enter the living room/lounge area. (move so that you are facing away from the radiator)
5.) Go to the bureau. Try to open the top drawer. It is locked.
6.) Go to the living room.
7.) Find a rectangular photograph and take the key from the underside. Replace the photo and return to the desk in the lounge.
8.) Open the drawer with the key. Keep the wood plug, radiator key, and two pictures.
9.) Look at the photos, especially the differences (a window is removed in the later picture).
10.) Go to the kitchen and read the note on the table.
11.) Take the coffee mug.
12.) Return to the radiator area and place the mug in the left corner, just under the keyhole. Place the key in the hole to release steam.
Kiosk:
1.) Talk to Stina about Carl Bergsten, asking all the questions in the notebook.
Katarina's home:
1.) Ask about Carl Bergsten.
2.) Look at your map as you leave - there is now a new location.
Museum of Design:
1.) Read all of the panels.
2.) Go to the computer. You'll need a token to turn it on.
3.) Look for the panel that has 17 boxes. It will be a memory match game. Once you've matched the shapes, you'll get a ticket.
4.) Write down the colors and shapes below the ticket. You'll need this information later to open the puzzle box at Solvig's house.
5.) Go to handicraft exhibit (via the stairs) and use the ticket in the door slot.
6.) Find and take a small dowel on the floor (between 2 wheels).
Solvig's house:
1.) Return to the desk and open the top drawer.
2.) Select the puzzel box. Use the dowel and place it in the hole in the bottom right corner.
3.) Use the color/shape sequence from the ticket to solve this puzzle. Alternatively, you can bypass the puzzle (or return to the museum and write down the shape/color sequence.) (note: I believe the solution is always the same: red pentagon, yellow circle, blue pentagon, yellow pentagon)
4.) Once you have the correct order, a lever will activate, but you need to clik on the box to open it.
5.) Take the blueprints.
6.) Look at the couple's photo in your inventory, then look at the blueprints using the magnifying glass. A X will mark the spot in an upstairs room.
7.) Go to the sitting room and click the cabinet with glass panels. The cabinet will move, but the room can not be opened yet.
8.) Head downstairs and look at the diploma from the herb garden.
Kiosk:
1.) Ask Stina questions from the notebook.
Herb garden:
1.) Talk to the gardner and get 5 herb cards.
2.) Solve the puzzle. (Bypass or place in the correct order: thyme, rosmary, lemon balm, oregano, absintium, creeping thyme)
3.) Talk to the gardner.
4.) Enter the house.
5.) Look at the calendar.
6.) Speak with the gardner about Simona.
7.) Find Simona in the garden.
8.) Ask Simona your questions.
9.) Pick up the yellow jacknife from the ground.
Solvig's house:
1.) Go back to the sitting room and move the cabinet.
2.) Use the knife on the wallpaper to tear it. Use it on the wall
again to make a secret door appear.
3.) Enter the room.
4.) Read from the book on the table.
5.) Exit the house and look at the map - notice a new location.
Library:
1.) Use the computer. Use the mouse to read the entire article.
Solvig's house:
1.) Read the note on the front door. Take the attached key and chewing gum.
2.) Use the key on the padlock to open up the hut.
3.) Take the flashlight.
4.) Enter the shed.
5.) Take the batteries from the bench.
6.) In your inventory, drag the batteries over the flashlight. Voila - light.
7.) Go back to the secret room in the sitting room.
8.) Use the flashlight.
9.) Read the paper. Read all the papers, but most importantly the autobiography notes.
10.) You should hear a creaking sound as you're reading the papers.
Click on the carpet and it will lift up to show floorboards.
Library:
1.) Use the computer. Find the new topics - two articles about Dietrich Gunter's body. These articles have some important plot points.
2.) As you leave the library, notice that you have a new location on your map: Mona Redvall's house.
Mona's house:
1.) Examine the keypad. The most worn keys are the ones you need for the code. I believe the solution always is 1,0,2,9.
2.) Once the green light appears, open the gate.
3.) Ask Mona the questions on your notepad.
Herb garden:
1.) Don't enter the lodge, but head to the deck.
2.) Take the fishpole.
3.) Walk by the lake.
Museum:
1.) Don't enter the museum. Find the shiny token (below the bridge left of the museum pathway).
2.) Use the fishing rod and chewing gum to get the token.
3.) Enter the museum and use the token on the computer.
4.) Read about Carl and the buildings he designed.
5.) Notice St Olof's school on your map.
St Olof School:
1.) Try to talk to the janitor. (He won't talk to you now).
Home:
1.) Use the phone to call Solvig. Ask questions. You'll need to find a lost key and clock.
Solvig's house:
1.) Look at the green shrubs beside the house. There will be no key.
Katarina's house:
1.) Interview her.
2.) Ask to borrow her son's metal detector. (Oddly, this places you directly in his room; you don't have to navigate there.)
3.) Look at the orange box on the dresser. You'll need to finish a puzzle to open it.
4.) Look at the computer game boxes. click on the top box to move it - read the post-it note.
5.) Look at the orange box. Open the Guitar Basics book in an open drawer. Write down the musical notes.
6.) Go to the guitar and pluck the strings in the right order. (light blue, yellow, green).
7.) Press the buttons in the same order on the orange box.
8.) Click on the box to open.
9.) Take the metal detector.
Solvig's house:
1.) Use the metal detector on the bushes next to the door.
2.) Take the key.
3.) Enter the house and go to the living room, to the chest.
4.) Use the key to open the left drawer.
5.) Take the pocketwatch.
Herb garden:
1.) Talk to the fishing gardener.
2.) Go to the river.
3.) Find the crowbar in the river.
4.) In your inventory, drag the metal detector over the fishing rod. Place that in the water.
5.) Take the crowbar.
6.) Talk to the gardner and ask for permission to take the crowbar.
He asks for salvinia from the water garden.
Home:
1.) In the kitchen, open up the cabinet and take a glass. Fill it with water from the kitchen sink.
2.) Water the basil plant in the kitchen window.
3.) Fill the glass of water again.
4.) When leaving your apartment, notice that you have a new location on your map: the water garden.
Water garden:
1.) Find the salvinia. Place it in the drinking glass.
Herb garden:
1.) Give the gardener the salvinia in the glass. Take the crowbar.
Solvig's house:
1.) Go back to the sitting room; move the cabinet and enter the secret room.
2.) Move the rug and use the crowbar to pry up the floorboards.
3.) Select the box that says JUGO. Read the letter. Notice the birth date.
4.) Replace the items.
5.) Go back to the living room chest.
6.) Solve the watch puzzle.
(watch puzzle steps: 1. depress the top left knob and run through all the numbers in the bottom left window. 2. Do the same thing for the top right knob and right window. 3. The numbers are the days per month and months per year. It's backwards from American notation (so it's dd:mm) 4. Use the birth date from the letter. (16:9).)
7.) Flip the watch over and open the back. There will be another puzzle.
Peggle Nights
If you were one of the many original Peggle addicts, you will definitely enjoy PopCap Games' sequel Peggle Nights.If you're not familiar with the game, the player fires a ball at the top of the screen and watches as it falls to the bottom, hitting and bouncing from peg to peg. The purpose is to remove all of the orange pegs before you run out of balls - each level starts with a specified number, usually 10. At the bottom of the screen is a moving "bucket" - think of a Pong paddle, except this bucket can catch the ball. If it's caught, it's a free ball, otherwise, you lose it. There are bonus pegs - green ones that may give you an additional ball or a shoot guide (shows which peg you'll hit and how it will bounce), and purple ones that are point bonuses. If you score more than 25k in one turn, you get a free ball. As the ball heads towards your last orange peg, you get a slow motion, zoomed camera and Beethoven's Ode to Joy. Fireworks go off, the ball bounces around until it hits a bonus bucket that ranges from 10k to 100k points. (Unless you clear the screen of all blue pegs, which gives you a bonus, and the buckets at the end are all 100k.)
The only control you have once you've pointed the launcher and clicked to release the ball is that you can right-click to speed up the bucket. This is both fun and frustrating!
You can choose to play the adventure mode, 5 levels for the 12 characters, or a challenge mode, also with 60 level, that have a challenge goal, such as having the lowest score. I found I was good at that one. The player must unlock the challenge mode by playing the adventure levels. There is also an option to have Quick Play game of any completed level as well as Duel mode, where you can play 2 player on the same computer (either with another live body or the computer).
This Peggle introduces new ways to replay shots as well as a trophy room. It also adds a new Peggle Master at the end (but no spoilers here!) The cute characters (excuse me, Peggle Masters) all live out their dreams, which comprise the backgrounds of the Peggle levels.
What they did well: They didn't name it Peggle 2. While it's a sequel, if it were Peggle 2, I'd probably expect a little more. The background animations of some of the levels are simply awesome. Both the pumpkin hand-drawn versions of paintings and the lab backgrounds are my favorites. Playing against the computer in duel mode is hella hard, but is a great, fun challenge. It does seem at times the computer has some sort of inside advantage. The powerups are all different on different characters' levels. For example, the green pegs sometimes give an extra ball. Other times, you get a "flipper" like item to hit the ball to keep it in play, much like pinball. While I get very tired of repetitive things, it's amazing how much I love the drum roll, slow motion camera as I hit my last orange peg. It's great feedback!!
What could have been better: It's like a Peggle add-on. Some people may not be delighted that it's not very different.
Recommended for: fans of Peggle, arcade games, and anyone who likes fun.

Friday, October 17, 2008
Cake Shop
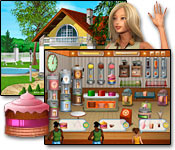
Cake Shop, a time management game from Elefun. You are Emily, a recent college graduate. An underwhelming cover letter lands you a job managing a cafe.Customers come in and their menu choices are displayed in a chat bubble. You'll prepare a layer cake, with one of three cakes, a filling (jelly?!), and another cake on top. Depending on your upgrades available in the shop, they may also order something else. Left-clicking on the item selects it; right clicking sends it to the customer. You can also click on the customer to send the item to them. Each customer starts out with a smiley face surrounded by a green timer. As they wait, the timer ticks away. Once the timer makes a round, the tip level decreases.
Each level is about 2 minutes.
Upgrades, called "fittings" are unlocked by a combination of available money and amount of tips earned. Upgrades include a coffee and a cappuccino machine; a cotton candy machine; three soda machines (cola, orange, and fresh, whatever the heck that flavor is - Fresca, perhaps?); three ice creams: strawberry, chocolate, and vanilla; two popcorns: sweet and salty; and three creams: peach, forest fruit (again, any idea what flavor that is?), and chocolate. The player must balance spending money for the fittings and towards building a house. As Emily gets depressed, building the house pumps up her attitude. The better her attitude, the more patience the customers have.
The trick is to make sure you keep all the upgrades filled.
What they did well: Towards the end, it did get difficult to manage all of the upgrades. Having the house building impact her attitude was a different and interesting take. It was easy to see the patience level of the customer and how much time you had left to serve them to get the best tip.
What could've been better: Overlooking the weak story design (why would a college graduate fly somewhere to manage a cake shop?) and weird character movements (really, just drag the image across a screen and have her flip her hand out for a taxi), Cake Shop was mostly just a time-waster. I didn't get any rewards out of playing it. Graphics were very low end and the music was repetitive. Speaking of repetitive, how about having to click through the same dialogue any time I wanted build something on the house? Additionally, it would make more sense for her attitude to make her a slower waitress, rather than affecting the patience levels of the customer. I encountered a pretty major bug when deleting a name. The screen and computer freeze. Behind the full-screen game is a Windows text box, asking if I am sure I want to delete that file. Once you click OK, you can go back to the game or close the game.
Overall, if this had been designed by a set of first year game students, it would be passable. Since it's not, I'd only recommend it for kids, who might not notice all the glaring issues.
Tuesday, October 14, 2008
Cassandra's Journey: The Legacy of Nostradamus
Cassandra's Journey: The Legacy of Nostradamus brought to you via JoyBits, is a mostly hidden-object game.In addition to the levels, there are 3 "divination" games that are unlocked via progressing through the story. They are unlocked at levels 4, 13, and 20.
The story is that a woman comes to you, Cassandra, who has recently started her divination business. She wants to find her brother. You have inherited your grandmother Serena's sense of fortune-telling, but need additional help from Nostradamus' ring. You start to have a vision of him, which oddly starts out with him IMing you.
There are two gameplay options: timed or relaxed. Like most hidden object games, there are penalties for random clicking (30 seconds), and hints that can be collected throughout the levels. There are blue, red, and green gems, which are banked as points. You spend the points on one of 3 items to help locate: a wand that glows brightly when lit (2 points), a general area highlight (1 point), or an object locator (3 points). The points add up quickly so if you want to be a lazy player and not look hard, there are lots of opportunities to acquire and use the hints. However, you get a time bonus and bonus points for not using jewels and/or hints, so to maximize your score, you want to use as few as possible.
There are other puzzle types: click to place the tile; "fix" something in the hidden object screen (reassemble a pizza; a building roof), match 3 to get a key and jewels, a semi-crossword, etc.
What they did well: The intro music was nice. It does have multiple types of puzzles to solve. They use the gamut of hidden object lists: riddles, puzzle pieces, lists, outlines. For their find-a-difference puzzles, there were 3 pictures instead of two, which made it slightly more challenging. They also used crosswords and match-3.
What they could've done better: First, proof-read. The text has quite a few glaring spelling errors. Plus, the conversations made little sense and the characters were less than believable. I'd prefer you not give me characters and text to read unless it really means something. Level 11 was very annoying to me, because you really don't do anything. The circles around the find the difference scenes made it difficult to detect the last few differences because the circles were so large. The book to start each level has even and odd pages. The odd pages automatically updated the picture to the left, which you could click on to start. In order to access the even pages, you had to physically click on the page on the book, then the picture. I encountered a bug that made a ticking sound loop over and over. Closing and restarting the game fixed the problem, but it happened more than once. Each divination can only be accessed once a day. There were a few random, odd voice-overs. I was very disappointed in the "magic tricks" which were glorified logic puzzles, optical illusions, and puzzles that have been passed around in e-mails for a long time.
Overall, it was not a very solid game, but kids and fans of hidden object games who want to play all varieties might enjoy it.
Hints (spoilers):
On the first find a difference:
Crow, bunny, pizza, scarf, sandwich on table, chair placement, sunglasses on head, picture (red shirt), photographer's bag
Words in crossword:
page2: forune, that, grandmother, magic, guess
page 3: Ring, help, have, mission(6)
page 4: greatest, talisman, with, thing
Chapter 13 find-a-difference:
chair, chick, banana, gramophone, postman, leaf, basketball, cactus, crow tag, small picture on board
Saturday, October 11, 2008
Diner Dash: Seasonal Snack pack
Diner Dash: Seasonal Snack Pack is another in the very popular time management Diner Dash series brought to us by PlayFirst games. Try them all for free at Big Fish Games:Diner Dash
Diner Dash Flo on the Go
Diner Dash Flo on the Go
They even created a version for kids:
SpongeBob SquarePants Diner Dash
Diner Dash: Seasonal Snack Pack is not for the faint of heart, and not for people who are new to the Diner Dash series: it gets up and running very quickly!
The player joins Flo and her Grandma for fun and excitement waiting tables at 5 new restaurants: it starts out at Coral Cover Cafe Waterpark (summer). All of the customers from previous Diner Dash games make an appearance, with all of their little peculiarities. The businesswomen like to be served fast. They don't like noise. Bookworms are slow to order and eat, and have more patience, but they don't like noise. Cell phone guys don't mind noise, and they are also impatient. Families don't mind noise and are moderately patient. The girls don't like noise and are moderately patient. Tourists like to be served quickly once seated, and often want you to stop and take their picture. (I still hate that breaking my chains!) Fitness ladies don't mind noise and are moderately impatient. They rarely order dessert. Lovebirds are patient, don't mind noise, but their kissing annoys tourists, bookworms, cell phone guys, and the girls.
Points are gained for chaining together actions: taking orders, delivering food, picking up the checks, clearing the tables, delivering "extras" such as appetizers and desserts. The level of patience left is shown by the number of hearts under each table. Quick service earns hearts.
There are bonus items, which include drinks (serve to tables to improve their patience/hearts), a podium (talk to people while they are waiting to improve patience), flowerpots for a bonus when seating tables, and appetizers and desserts. Each person in the dining party has a specific color - that color can also earn a bonus, if you seat them in a matching same color seat. This is, as always, one of the best ways to earn points and gain expert level.
The story continues to four other restaurants (and 3 other seasons): the Crypt Cafe, Hometown Harvest, Winter Wonderland, and Romantic Rendezvous. (Don't you know Cookie would love it there.)
Unlike the other Diner Dash games, which gradually introduces characters, colors, and bonus items, the first two levels have the drink bonus, flowerpot bonus, and podium available. The customers and colors are varied. In level 3, the snack station is opened up. Level 4 gives desserts. By level 6, all of the customers are unlocked and so are the purple colored customers. It's quite a challenge!
As an FYI, when playing against a waiter/waitress to earn more points than they do, the biggest points are earned by seating groups (matching customer color to the seat, of course) and taking the check. Use these to your advantage. You also can get a bonus if you seat people at a table where you've placed a flowerpot...but be quick because the rival waiter/waitress will get the bonus if they seat people there!
What they did well:
The graphics are improved, and it combines all elements from the previous games. The story line is fun, and it is a challenge even for veteran Diner Dash players. The competition levels where you have to earn a certain number of points more than the other waiter/waitress are a lot of fun. It was fun to see all the different customer types come through the water park slide, and the other restaurants are all unique.
What could've been better:
The music. It's disappointing that there isn't more variation. Also, they expect that the player is familiar with the Diner Dash family, as they don't introduce the different customers and describe how to maximize points with them. I also wish they'd take the Crypt Cafe and had the customers dress up for the season.
Recommended for: fans of Diner Dash or time management games.

Monday, October 6, 2008
Restaurant Rush obession
Sorry it's been a while since I've updated the game blog, but I've been busy with the Restaurant Rush game. I got all the way to the 60th restaurant and got stuck, so I had to start all over.So my tip is to spend your money wisely on three things: recipes, jukebox music that improves patience by 40-50%, and at the Farmer's Market. Beef and vegetables are the best to upgrade, because they are used in so many recipes.
Sadly, one of my jukebox songs (for 50% more patience) got bugged somehow. Whenever I clicked it, the program crashed. Anyone else have problems with that or know how to fix it?
I ended up with the 3rd best option (not following my tips above), and am in the process of replaying the game. The bonus to finishing the game is that it allows you to start with the recipes you purchased in the first go-round. (Prices for tea and soup, along with all upgrades including the tea and soup machines, farmer's market and jukebox songs) start over. So I'm giving it another run through to get to the best ending.
More game updates soon, though!
Thursday, September 18, 2008
Cake Mania 3
Cake Mania 3, a fun time management game from Sandlot games, builds on the successful Cake Mania franchise. In Cake Mania 3, Jill is about to get married to Jack (who you may remember from the previous game) when a time distortion ball breaks, sending her friends and family to different eras: prehistoric, ancient Egypt, the Ming dynasty in China, 17th or 18th century Paris, and perhaps the Shire.As in previous Cake Mania games, the purpose is to give a customer a menu, take the order, make the cake, ice it, garnish it (if you've unlocked that tool) and deliver it, trying maintain or improve the customer level of hearts (patience). Items to unlock include a phone, additional ovens and icing machines, a display case, a tea maker, and garnish tools. Other items include a phone to take cake orders over the phone, and shoes for swiftness. Of course, each of these can be upgraded. They are purchased with the profits from your days.
In each time scenario, there are different power ups to use. The prehistoric has a club that allows you to give any cake to the waiting customer. In Egypt, the Ra power-up extends the day. In China, the Tao of Cake (which is a phrase I may borrow for my own purposes) extends the patience (it doesn't give more, but holds the customers at their current heart level). In the Shire/Fairyland, the crystal ball will tell you what the next customer without a menu will order.
There is an additional powerup that is achieved either through making a specific cake or through strings of 3-series (3 menus, 3 coin collections, etc). This sugar rush makes all the tools (ovens, tea machine, icers, garnishers) produce instantly instead of having a timer. This is a fun element to manage!
In addition to gameplay, there is a sandbox area where you can create wedding cakes, save and send them as e-cards. This does not need to be unlocked, but can be accessed from the first play. A cartoon function will also be unlocked down the road. There are also mini-games on the map, where you have to make and package a certain number of cakes off a conveyor belt. You can earn extra money this way, as well as bonus power-ups.
What they did well: Cutscenes added voice-overs, a nice change of pace for a casual game! The text was witty and poked good fun (for example, Jill wonders why cavemen and dinosaurs are together). I played the first release of Cake Mania 2 and encountered several major showstopper bugs. This version seems much more solid. I found the controls worked better than in the previous games. The costumes for Jill were hilarious. Each customer "pays" with appropriate "coin" (i.e. chimps pay with bones, dinos with stones, etc.) That attention to detail is nice. The sandbox mode, the mini-games, and the save functions are all superb additions.
What could have been better: An explanation of why they had a time distortion ball in the first place. The Ra gift from Egypt didn't seem to add much gameplay value.
Cake Mania 3 is a big improvement over Cake Mania 2 and is a very fun time management game.
Recommended for: fans of the Cake Mania series, time management game fans, and those with a sense of humor
Wednesday, September 17, 2008
mystery chronicles: murder among friends
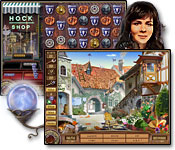
Mystery Chronicles: Murder Among Friends is a hidden object game from Lazy Turtle Games.The setting is France, around the turn of the 20th century. Your cousin and wife were killed, and their butler and children are missing. It's your job to solve the crime. You have the option of playing in either the relaxed or the timed mode. Each chapter starts with 45 minutes on the clock. As with all hidden object games, there is a list of items to locate, and a hint to help. In this case, it's a magnifying glass. Clicking on it highlights one object still unfound on the screen. It takes 2 full minutes to recharge. There are multiple scenes in most chapters, and clicking on the footprints in the lower right hand box opened up the additional scenes, in case you get stuck and want to move on to finding something else.
I found I had to click seven times in quick succession before I encountered a time penalty (30 seconds). However, slow random clicks did not seem to have any effect. There are no bonuses for locating multiple objects in quick fashion.
What was done well: mini-games intersperse the hidden object scenes. You may have to play a game similar to minesweeper or piece together paper fragments, as examples. The story was intriguing. Items frequently looked the same from scene to scene (i.e. the brown briefcase you collect from the first location of the Mansion will be the same brown briefcase in other scenes as well).
What could have been better: I found the objects frequently blended in with the background. For example, in the first location, the mansion, the bullet hole in the window was difficult to locate. In the garden, the coffee grinder in the weeds was impossible for me to discern. There was no way to magnify an area, which contributed to my frustration in locating blended objects. Occasionally, there were items that I had not heard of (i.e. Hanoi tower - the ring tower). Many of the items to find had nothing to do with solving the mystery. In one scene, there is clearly a dead body. Clicking on it prompted no action. It wasn't until the end of the scene that you "discover" the body in text. That was too contrived for my tastes.
Recommended for: hidden object mystery fans

Monday, September 8, 2008
School House Shuffle
School House Shuffle is a time management game, where you create a school and attempt to turn the kids into geniuses. Ms. Brighton, who is the school principal, talks like Charlie Brown's teacher.The levels start slowly, with one grade at a time. The grades are distinguished by hair color. The second grade starts at level 7. This is a school that you and I probably would wish we had attended. When kids get hungry or need to go to the bathroom, they get dismissed to the cafeteria or to the restroom.
To help corral the kids, the player starts with a hall monitor (if a kid passes within his range, (s)he will go back to class) and a chaperone (get it close enough to the kid and the kid will follow the chaperone). Money is earned as kids learn and at the end of the day. There is a bonus if the class performed well enough to earn an A. (Note: if there is a way to earn an A on the first two levels, I was unable to figure out the appropriate strategy.) The money purchases upgrades (faster restroom/cafeteria breaks, better classrooms for faster learning; additional staff to help with control the children; aesthetic improvements to the school).
What they did well: the music is good. It has several different themes: one that reminded me of the Incredibles; another that was very swing-style, and a third that made me think of Jerry Lee Lewis. I liked the personalization of the profile screen, where the player gets to name the school and pick a favorite class. The school name shows up on the play screen as well, which was a very nice touch. Also, the paper that was the background for the summary sometimes had some funny non-sequiturs. The gym, which reminded me of a hamster ball, was amusing.
What could have been better: Controls. It was difficult to click on the kids/monitor/chaperone/janitor, especially when the kids were in the gym. I would send a kid to the cafeteria to get something to eat, then click on the janitor to repair something. All of a sudden, I'd notice the kid was wandering off and not going to the cafeteria. That was pretty frustrating. For many parts of the game, I was waiting for something to happen. It was worse in the early levels, but even in the more advanced levels, I sometimes had nothing to do. It didn't make sense that the principal would be disciplining the classes, which acted up multiple times in the day. Each time she disciplined them, this annoying pop-up message would appear. Also, apparently the staff is not the cream of the crop, as they doze off and the principal must discipline them too.
I have to say that I was disappointed in the execution of this game. I expected it to be much more fun and enjoyable than it was. Instead, playing through felt a little bit like torture.

Sunday, September 7, 2008
Home Sweet Home 2: Kitchens and Baths
Home Sweet Home 2: Kitchens and Baths is the second game in the Home Sweet Home series. As in the first game, it's a home decorating sim, except the focus is now kitchens and bathrooms, whereas the first one centered around living rooms.There are two phases to each level: the decorating and then the building. For decorating, you start with a room - sometimes the room has stuff in it, sometimes it's pretty bare - a budget, and what amounts to a word puzzle. The clients are never quite specific about what they want: it's always caged in a descriptive form. For example, one level will have a movie star telling you he will have 2 of his dudes over and they would bring a friend and he needs a place to chill. The player must interpret that as needing to use 5 chairs in the room to make the maximum score. The goal is to meet the customer desire, within budget. In order to move on to the build phase, a minimum customer satisfaction level must be met and all items must be placed (most levels require a minimum number of things to be built). If you can't figure out what the customer wants, there are hints available.
In the build phase, you have 3 workers (you might recognize them from HSH 1!) to help you build out the room in a specific number of days. There are power-ups, where an item will flash the worker's color. Placing the worker on that item will result in them building faster. Coffee is also available, which perks up the worker and prevents them from getting hurt (and slowing down the process). Occasionally, the workers will stop and ask for a tool that the player must find in the toolbox.
The level score is determined by the customer satisfaction (up to 1000 points), whether the player used a hint (not using a hint gives a 100 point bonus) and a build score for achieving the goal in the number of days. 3 medals are awarded: bronze, for reaching 1400 points, silver for 1700 points, and gold for 1900 points. Each level also unlocks 2 items which the player can use to decorate a bonus personal apartment.
What they did well: it's an enjoyable sim. There was never any point at which I felt stressed. Moving items from one place to another was easy, and it was nice to be able to recycle materials. The build levels were sometimes quite challenging, keeping the workers injury free, motivated, and getting all the items built. New items unlock all the time. The word puzzles are fun to decipher. Wall colors are rich and full.
What could have been better: The graphics on the level-choosing screen. It wasn't always immediately obvious which was the new level (sometimes you design rooms for the same client). I was able to make some very odd bathroom and kitchen arrangements. For example, there were some kitchens that lacked a refrigerator and/or a sink. A few bathrooms were missing a toilet. I was still able to get the gold score for that level, though. That seemed odd. Also, there was no penalty for placing items that made the customer unhappy. So a player could spend a lot of time in trial and error and still get a high score. Personally, I would've appreciated more of a challenge (i.e. sale price of placed items is half the value, etc).
Recommended for: fans of decorating shows, or Home Sweet Home

Tuesday, September 2, 2008
Azada Ancient Magic Walkthrough
Technically, this is not a game review, but the feedback I've received is that people would like a walkthrough. This contains spoilers, so please only read through as a last resort. Happy puzzling, everyone!The Fairytale:
You have to rescue Rapunzel from her tower prison. There is no way to get up there from the first page. Click on Rapunzel and take the 1 blue shutter. Place it in your bag.
Page 2: Navigate through the maze to pick up wood on the right hand side and the second shutter, which is in the middle
Page 3: Open the door for the little pig’s household.
Page 4: Take the candle.
Go back to Page 3. Place the wood in the fireplace and use the candle to light the fire to smoke out the wolf. When he leaves, so will the pig. Take the key and the muffin along with the ladder.
Page 4: use both of the shutters on the ladder maker’s window. Open the window and collect the second ladder. Feed the wolf the muffin. Use the key to unlock the cupboard and get the card.
Return to Page 1. Use one ladder for the lower level, one for the second level. Rapunzel is free. Give her the card.
The Castaway:
You’re helping Robinson Crusoe.
Page 2: take the handkerchief (checked cloth on tree).
Page 3: Pick up the shovel head on the ground and the fishing pole on the LH side of the screen near the green snake.
Page 4: Take the rock on the bottom of the page and the machete leaning against the tree.
Go back to Page 2 and use the machete to chop the tree branch. Collect the tree branch. Use the hankie on the shovel head and connect to the tree branch.
Go back to page 3 and dig in the soft spot to uncover the crystal. Take the crystal.
Go back to page 1 and put the crystal in the machine. Light up all the mirrors. Use the fishing pole to get the bottle in the water, then break it with the rock. Give Robinson his card.
The Ghost:
Restore the room as it used to be. Close the door. Put pillow back on the couch. Place the books under the sofa on the middle-most shelf.
Page 2: take the blue paintbrush. Assemble the picture.
Page 3: take the egg and the statue. Open the cabinet by fitting blocks. Take the necklace and the card from the drawer that opens.
Back to page 1. Place the statue on the table, the board on the wall, the necklace on the Asian statue, and the egg on the edge of the bookshelf. Place the painting in the empty frame and the paintbrush in the holder on the middle shelf on the bottom.
The Secret Garden:
Page 1: Open the window. Pick up the clothes on the chair and put them on Colin. Notice the robin outside the window.
Page 2: pick up the watering can.
Page 3: Take the trowel in the sand, the pruning shears by the water, and the whistle off the pump handle. Fill the watering can by placing it under the pump and clicking the pump handle.
Page 2: Whistle to the robin, who will come and eat the worm. Dig with the trowel to uncover seeds and a key. Prune the ivy with the shears. Use the key to unlock the gate.
Page 4: Now uncovered after opening the gate. Use pruning shears in the overgrown garden. Take the twig from the right hand corner. Put seeds on the flower bed and water them with the full watering can. Solve the puzzle by placing the correct number of flowers around the circled number. Whistle at the robin, who will go to the tree. Give the twig to the robin, who will build a nest. An apple will appear. Take the apple.
Go back to page 1 and give Colin the apple. He will leave. Move the cover over the painting and take the card.
Go to page 4 to meet Colin in the Secret Garden. Give him the card.
The Timeline:
Page 1: take the Coat of Arms
Page 2: Solve puzzle by raising/lowering the ball. Hint: the blue star will make the ball jump from one blocked side to the next. After opening, take the wine jar from the drunk guard. Place the Coat of Arms above the gate.
Page 3: Take the head of Horus. Go back to Page 1.
Page 1: dig in the soft spot. Place the bottle of wine in the hole. Cover up the bottle.
Page 3: dig in the soft spot. Uncover the wine, which is now vinegar. Take the bottle of vinegar.
Page 2: clean the plaque using the bottle of vinegar. Place the head of Horus on his body. Use the pattern of the eyes to click on the left or right eye. Doing the correct pattern will unlock the card from the sphinx’s mouth. Give the card to the Voyager.
The Vampire:
Page 1: Take crowbar by the locked door on the right hand side of the page. Use it to remove the barricaded window on the castle on the opposite page.
Page 2: take the rag hanging from the rack, and place it on the lid. Cover the steaming pot with the lid. Take the knife from behind the steam. Unlock the poison door, and take the cloves of garlic.
Page 3: open the curtain. Turn the clock on the mantle to daylight hours. Take the garlic and give to Dracula. He will move to the light and go away. Open the journal with the knife and take the card inside. Also take the key on the table.
Page 1: use the key to open the gate and give Jonathan Harker his card.
The Treasure:
Page 2: take the Jolly Roger flag and place it on the mast. Take the two matchsticks and light them on the candle.
Go back to page 1, and get the Key from Long John Silver.
Return to page 2 and open the small box. Take the pieces of eight.
Go to page 1 and hand the bird the pieces of eight. He will fly away and gunpowder will be below. Put that and the cannonball (to the right of the cannon; a little difficult to find) in the cannon. Light the cannon with one of the matches and point at the landslide. They will be blown away.
Page 4: use the last matchstick to light the lamp in the middle of the room. Open the book, which has a map and the card. Take the shovel.
Go to Page 3, where Long John Silver is now. Give him the map, and the X will mark the spot. Dig with the shovel. Solve the puzzle and give him his card.
Headless Horseman:
Page 1: take the crowbar.
Page 2: Take the Shovel. Use the crowbar on the locked door, which will open up a pattern on the side of the mausoleum. Open up the 3 tombstones with symbols on them and press the symbols in the correct order. They will remain lit up if you are pressing them properly. If you mess up, start from the beginning. You will get a card from a skeleton.
Return to Page 1. Use the shovel to remove the moon from the tombstone.
Go to Page 3 and place the moon on the crypt. It will open. Get the skull. Tip for the moon mini-game: the moons stop growing as soon as they hit anything (a side of the box or another moon) so make the first ones as big as you can.
Go to page 1 and give the headless horseman his head and card.
The Descent:
Page 1: click book for a secret note. Use the magnifying glass on the desk to read. Earn a cryptex by matching stones as part of a mini-puzzle. Take the matchbox, fishing pole, mirror, runes book, Latin book. Open the note again and decipher it by placing the items in this order: runes – cryptex - mirror – Latin. Give the note to the professor.
Page 2: take the gunpowder, pickaxe, and rope. Use the pickaxe on the stump to get grubs.
Page 3: use the pickaxe on the strange-looking trees. Use the rope to lash them together to make a raft. Put grubs on fishing pole and capture strange fish.
Page 4: Feed fish to dinosaur. Put the gunpowder against the wall and light with the matchbox. Take a picture of the Professor to get his card.
The Dive:
Page 1: Take the cog from the shark’s mouth, swimming in the background.
Page 2: underneath, take the dry coal, the wrench (under wood). Use to open the hatch. The top part of the page will drain. Can now also pick up card after draining the hatch. Open the furnace and remove wet coat. Replace with the dry coal. Push red button and play the mini-puzzle. Pull the lever.
Page 3: Take the pearls from the oysters. Place the cog in the RH side page where it says it’s missing a part. Pick up the stone disk and go back to Nemo on Page 1.
Page 1: play the stone disk on the turntable. It will give the pattern: 3,4,1,2.
Go back to page 3. Play the pattern on the symbols (hint: they are numbered 1,2,3,4 in ascending order.) It will open up and give you a card and a medallion. The medallion is missing a pearl. Place one of your pearls inside.
Return to Nemo on page 1. Give him the medallion and the card.
The World of Oz
Page 3: Take the axe, the oil, the magnet, wood, and board.
Go to page 2 and oil the Tin man. Guide him through the maze, using the wood and board to get him over rough spots. Chop down trees in the way with the axe. He only travels in a straight line, so use the magnet to turn him. Get the card and the slippers.
Go back to page 1 and give Dorothy her slippers and the card.
The Witch:
Page 1: Take the bread paddle by the oven.
Page 2: take the burlap sack and bucket. The witch won’t let you take anything else at this time.
Page 3: Play the mini-game to trap the chicken. (hint: use your light to make it go into the center where it can’t escape).
Page 2: Give the chicken to the witch. She’ll tell you to put it in the pot. Return to Page 1 and fill the bucket with water from her well. Go back to Page 2 and put the water in the pot and stoke the fire. The kitchen will get steamy and the witch will leave. Move quickly! Get the bread from the table, click the book and take Gretel’s card, the key from the wall left of the oven, and the chicken bone from the chicken on the table. If the witch returns before you’ve gotten all four objects, go back to the well and fill with bucket with water and repeat.
Page 1: Make sure the witch isn’t outside (she will be if the kitchen is too steamy). If she is outside, flip to page 2 and then back to page 1. Give Hansel the chicken bone. Fill the bucket with water again. Return to page 2 and steam the kitchen. The witch will go outside.
Return to page 1. The witch will check Hansel’s finger and think he’s still too skinny. Put the bread on the bread paddle and into the oven. When the witch goes to check on it, hit her with the bread paddle and she’ll be stuck inside. Pick up the breadcrumbs on the ground and use the key to free Hansel.
Go to Page 3, and use the bread crumbs to call the swan. Give Gretel her card.
The Detective:
Page 2: Open the right desk drawer; take the pen. Click on the safety-deposit box and get fingerprints.
Page 3: Collect a footprint from the floor. Get the ice pick by the sink. Take the footprint from your inventory and compare it to the engineer’s boot. He’ll turn around. Use your fingerprint from your inventory to compare to his hand. He’ll leave. Take the wrench from the tool box.
Return to page 1 and give Sherlock the footprint and fingerprint samples.
Go to page 4 and take the mail container on the right of the desk. Click on the paper below the headphones to play a mini puzzle. It’s a cryptogram and the solution is “Package on ice retrieve at port”. Look on the left hand side of the desk at the requisition paper to see who requested ice. Use the pen to check the requisition by ice. Put the requisition form inside the mail container. Use the wrench to remove a part of the pipe next to the mail slot.
Page 2: use the pipe piece to repair the broken mail system. Put the mail container inside the mail slot. Click the lever and send the container.
Page 3: the necklace is encased in ice in the kitchen. Use the ice pick to free the necklace. Take the necklace back to Sherlock.
Page 1:Give Sherlock the necklace. He’ll give you a key.
Return to Page 2: open the corresponding safety deposit box (#13) with the key to get the card.
Return to Page 1 and give Sherlock his card.
The Gold Rush:
Page 4: wait for the miner to put down his pickaxe. Move fast and grab it!
Page 2: use the pickaxe to break into the box on the wall and get the keys. Open the cell door with the keys. Pick up the dynamite.
Go to page 3 (the bank) and use the dynamite on the safe. Take the key and card. Use the key to open the drawer. Get the deed from the drawer.
Go to page 4 and give the miner his deed. He will give you 1 gold nugget. You have to play a mini-puzzle to get the second piece.
Return to page 1 and give Buffalo Bill the gold pieces and his card.
The Traveler:
Page 2: Unplug the fan. Get the code from the fan. It will not go into your inventory, so write the code down. (85709). Click the cube and play the mini-game. Take the card.
Return to Page 1 and use the code to open the time machine. Clicking on the machine shows you need a handle and a power source.
Page 3: Take the sphere. Unlock the drawer by making the rows/columns match the side tallies. Take the handle and sphere to Page 1.
Page 1: Attach the handle and sphere to the time machine. Give the Traveler his card.
The Strange Case:
This involves Dr. Jekyll and Mr. Hyde. Each of the pages has two sheets: one that is active when Dr. Jekyll is around and one when Mr. Hyde is around.
Page 1: Dr. Jekyll needs snapdragon, salt, and phosphorous to make a potion. Locate the switch potion on his desk and take it into inventory. Give this to Dr. Jekyll to make Mr. Hyde appear.
Go to Page 2: (this is a small office) Take the crowbar and open the wooden crate with the crowbar. Take the phosphorous.
Go to Page 3: (hotel reception) Take the pen from the desk.
Go back to Page 1. Give Hyde the switch potion. He returns to Dr. Jekyll. Take the paper on the desk and trace his name.
Go to Page 2: (pharmacy). Give the pharmacist the paper. He will give you snapdragon.
Go to Page 3: (hotel room) Click on the nightstand and use the pen check the box for dinner.
Go back to Page 1. Give the switch potion to Dr. Jekyll.
Go back to Page 3: (hotel reception) Give the clerk the dinner order.
Go back to Page 1. Give the switch potion to Mr. Hyde.
Go back to Page 3: (hotel room). Take the salt off the dinner tray. Click the nightstand and use the pen to place a laundry order.
Go back to Page 1: Give the switch potion to Dr. Jekyll.
Go to Page 3: (hotel reception). Give the laundry order to the clerk.
Go back to Page 1: Give the switch potion to Mr. Hyde. You can place all 3 ingredients into the test tubes and play the mini-puzzle. Get the reflux potion.
Go to Page 3: (hotel room) Take the key out of the pocket from the laundry.
Go back to Page 1. Give Dr. Jekyll the switch potion.
Go to page 3 (small office) Use the key to open the drawer and remove the card.
Page 1: Give Mr. Hyde the switch potion. Give Dr. Jekyll the reflux potion and his card.
The Voyage:
Page 1: take the 3 weights off the balloon, and the bell off the ground.
Page 3: Attach the bell to the top right of the door. Ring the door bell. The valet will stick his head outside. Quickly go back to Page 2, inside the club room.
Page 2: play the mini puzzle to pop balloons. Hint: the balloon with the 3 | | | will shoot 3 balls – use it to point to the balloons below. Earn two coins from winning that. The valet will be back. Go back to Page 3.
Page 3: talk to Newsboy. Buy both of his papers with your two coins. Get the papers and a card. Ring the bell again.
Page 2: Get the watch off the shelf and light the newspaper on fire in the fireplace (if the valet comes back, just keep going back to Page 3 and ring the doorbell until you’re finished)
Page 1: Talk to Phileaus Fogg. He’ll ask you to light the balloon. Do that with the flaming newspaper. Give Phileaus the watch and the card.
Invisible man:
Page 1: Read journal for ingredients. Need original potion, crow feather, boiled egg, pinch of salt, and tree bark. Take the bread off the table.
Page 3: Knock on the door. When the proprietor comes to the door, go back to Page 2.
Page 2: take the meat grinder, the boiled egg, pinch of salt, and the card. If he comes back before you can grab all these things, keep going back to Page 3 and knocking on the door.
Page 3: use the meat grinder on the bread to get breadcrumbs. Place the crumbs in the bird feeder. A crow will drop a feather. Pick up the feather.
Page 4: (lab) Pick up knife. Play the mini-puzzle to get the original potion.
Return to Page 1 and add all ingredients to the option. Give to card and potion to the invisible man.
The Baron:
Page 2: Do the cog puzzle, and take the hearing aid from Selenite.
Page 3: Take the mirror frame on the ground.
Page 1: click the chest behind the Baron. Put the hearing aid in the hole. Turn the dials until you see a “click”. Take the portrait and place it in the mirror frame.
Page 3: Trade out the mirror fro the portrait frame. While the Vulcan is looking at the portrait, take the card from his hand.
Page 1: Put the mirror in the hole in the barrel in the water. Click the mirror until it is reflecting light.
Page 2: Use the device by pushing the red button. It will fire 3 bursts of lasers.
Page 1: Return to the Baron. Give him the card.
The Legend:
Page 1: Read the book. You need a sprig of rue, magical water, and a moon beam for the potion. Collect the firewood, prism, and vial.
Page 2: fill the vial with water from the magical lake.
Page 3: Take the dagger off the table. Place the prism on the ritual table.
Page 2: Use the dagger to cut off the rue branch.
Page 1: use the firewood to stoke the fire under the cauldron. Add the rue and the water. Take the deliverance potion
Page 3: give the potion to Merlin. He’ll vanish.
Page 2: Go back to the lake area. Merlin needs his staff.
Return to Page 3: pick up Merlin’s staff by the tree where Merlin was detained.
Page 2: Take Excalibur from the Lady of the Lake when Merlin calls her forth. Give Excalibur to Arthur. Give Arthur his card.
The Creature (bonus book)
Unlock The Creature by going to the portrait of Titus and entering the code “Magic Book”.
Page 2: Collect all the body parts. Solve the mini-puzzle to open the machine and get the card. Collect the lightning rod and the extension cord. Place the lightning rod on the tower on the opposite page.
Page 1: Attach the body parts similar to a jigsaw puzzle. Open the window. Connect the extension cord from the one outside to the one hanging from the ceiling.
Return to Page 2. Watch the lightning strike
Go to Page 1. Give Dr. Frankenstein his card.
The Genie (Last book):
Go to Page 4. Take the oily rag. Play the mini-game and light the fuses to make the freezer work.
Go to Page 3. Get the hammer off the floor and the wrench next to the stairs. Light the rag on fire from the furnace.
Page 1: Put the burning rag on the Genie. Take the compass on the right. Take the box in the stairway. Open the vase and get one part of a card. Keep using the burning rag to subdue the Genie as often as needed.
Page 2: Use the compass in the circle. Direct the ball through the labyrinth with your mouse (hint: use the compass for directions!). You’ll get the second card piece for this.
Page 4: Open the freezer door. Put the box inside the freezer. Use the hammer to break the frozen lock. Open the box – collect the third card. They will fuse together.
Page 1: Give the card to the Genie and he will be banished….or will he?
Sunday, August 31, 2008
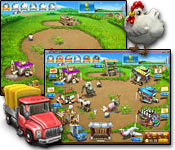
Farm Frenzy 2
Farm Frenzy 2 is the second in the Farm Frenzy series. It's a fast sequel; Farm Frenzy was first released in February 2008.In Farm Frenzy, you plant grass to feed your animals (hens, pigs, cows) and collect their goods (eggs, milk, meat) by clicking on them, sending them to your warehouse. You can sell the products at market, or build new buildings where you can process the product into higher grossing items such as egg powder or pie crust or desserts.
To earn money, you must load up your truck to the city to sell your goods. It's worth upgrading the truck and plane so they travel faster, so you can get the money back sooner (they must return before the money becomes available for use).
Adding to the fun, bears drop in and attack your animals. The bears have received an art upgrade for FF2, and I'll leave it as a surprise to the player how they now look. There is now more than 1 type, and I'll leave the teaser that I chuckled over them. You can trap them so they don't kill your animals and either sell them at market, or let them escape and run off your farm.
Farm Frenzy can be a lot to manage! If you run out of water, and don't have enough money to replenish the well, your animals will die. They all make very funny sounds as they perish. Sometimes the pace is a bit hectic, especially when 3 or more bears drop into your little space!
Each level will have specific goals (for example, amass 15 chickens or make 15 crusts). There are time bonuses to reach a gold or silver level, that gives you bonus stars.
Stars are spent to upgrade your buildings (upgraded buildings take more raw items and produce more output), pets (dogs can help with trapping bears; cats collect items on the ground), vehicles (can store more and go faster), wells (larger well, fill faster) and storage space. Smart use of upgrades goes a long way in this game! For buildings and vehicles, players may want to note that the upgrade only unlocks the upgrade for that level. The player must earn enough money during the level to upgrade them.
There are 19 awards available for both the goal-based levels and survival modes (which is unlocked by finishing half of the goal-based game). They range the gamut for breaking your own time record, finding the gags in the game, collecting products, or playing 10 consecutive levels without losing an animal.
What they did well: While similar to Farm Frenzy, the graphics are improved and are very cute. Levels are pretty challenging, especially if you're trying to get gold on all of them. There are 19 awards to unlock, including ones from survival mode. The UI (user interface) is much improved, and it's easier to track how much money you have and what goals need to be accomplished. Levels are quick and it's easy to jump in and out of the game. Some levels have the gold level goal as 1 minute 30 seconds!
What could've been better: Both the original game and Farm Frenzy 2 had only one song that plays during the levels. However, I enjoyed the original song, and did not like this one.
Recommended for: people who want to jump in and out of a game quickly, time management aficionados, and Farm Frenzy fans.

Saturday, August 30, 2008
Azada: Ancient Magic
Azada: Ancient Magic is the next in hit series Azada ™. Created, produced, and currently only available from Big Fish Games, Ancient Magic is another puzzle game.Before writing the review, I replayed Azada. At the end of Azada, you free Titus. He says to keep in mind the words "Magic Book." Indeed, that is the trouble he calls you to solve. His great-grandfather Angus noticed that book characters had come to life, complete with bad and good personalities. They were complaining about not being read recently, or wanting more story lines. You are called in to help decipher what evil has brought the characters to life.
This involves flipping through pages of each storybook and solving the puzzles that arise. Some are search and find; some involve deciphering code. The answers aren't always apparent, such as when you bury a bottle of wine so it can become vinegar. When the puzzles are solved, the icon at the bottom right of the page will indicate that the page is complete. One of the items that must always be located is a card (almost like a Tarot card) that will 'free' the character from the book.
When the series of books are complete, the cards are collected in another book, and you analyze them for secret symbols to decipher which character is causing mischief. Symbols appear on the card as you look through the magic decoder ring. As in Azada, there are hints available for a time penalty, and orbs are earned to skip puzzles.
What they did well: You will be introduced to many childhood favorite characters. To name a few (but not give too much away), there is Rapunzel, Robinson Crusoe, one of the 3 little pigs, a character from Secret Garden.... It's fun to flip through the pages, and the satchel is handy for having the items from previous pages. There is more inventiveness in the puzzles, and I actually found them more fun than the first Azada. The story line also works well as a mystery, since the player is trying to figure out who is behind the evil. New music is an added benefit and also an improvement over Azada. Additionally, the puzzles are not as repetetive as in Azada. I giggled over how the garlic that was hidden in Dracula's kitchen had a BIG poison sign over it. The art is good for a puzzle game.
What could be better: While you do actually get to move from the library, which is an improvement over the first Azada, it's just to work the machine. Every time you finish with a set of books, it tells you to go use the machine. I found both the linearity and the reminder annoying. Why couldn't I wait to check the cards until I'd completed 2 sets of books? The cut scenes where Angus is explaining things have two buttons: a forward and a back. The forward button does not work. So I either had to skip through and miss the information, or wait the set amount of time before the text moved on to the next point. Unfortunately, the back button *does* work, but it meant I had to wait for the next few screens of text (that I'd already read) to complete their timer again. I also got pretty frustrated with one of the puzzles where you had to put things back in their original place from a hazy, black and white image. Finding where to put a necklace took me an annoyingly long time.
Even given the negatives, Azada: Ancient Magic is definitely a different and enjoyable take on the puzzle genre.
Recommended for: fans of Azada, puzzles, or brain teasers, or people interested in checking out the puzzle genre.
Thursday, August 28, 2008
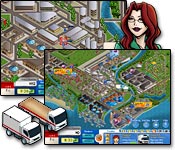
Road to Riches
Road to Riches is a large, 40MB download that is a business simulation.You're John, a loyal and hard-working trucking employee who is let go ("retrenched") by a boss only interested in lining his pockets. Through your friends' and families' encouragement, you start your own trucking business.
You start with one truck that is leased. The goal of the game is to take orders, indicated by an orange dot on a purple background. The truck drives to the dot and see what the order is (what's the load, how heavy is it, the delivery due time, and where it must be delivered). The player must make decisions and only choose deliveries that can be made within the timeframe, as late deliveries only pay half, and deliveries after 6 pm (18:00) are free.
At the end of the day, the game takes you to a balance sheet where you see revenue (what you earned) and then the costs associated with the business, including "fixed costs", gas (petrol), vehicle maintenance and depreciation, and a "mishap". A reputation bar is displayed on the screen. Reputation is built by delivering jobs on time. You can also choose different ways of advertising through the business tab. Both a good reputation and advertising work to bring in more orders. As the game progresses, you can both purchase additional trucks and drivers. (You can also "retrench" them for some karmic balance.)
Pick-ups and deliveries can be moved around as it makes destination sense through manipulation of the 'i' button from the main screen. Multiple trucks/drivers and managing the routes well will increase the profit margin.
You also have a pager that will buzz with additional immediate jobs, if you answer in 10 seconds. Other freelance jobs appear as well. In order to advance, there are objectives to meet, such as earning $5,000 with a positive account balance, or have 5 contracts, or own multiple trucks.
What they did well: it's a good simulation of many of the costs that are involved with trying to get a business off the ground. The story is fun and it is a challenging sim. It's nice to have a fast forward button when the truck is full and is driving around doing deliveries. The pause button is invaluable when trying to organize multiple truck deliveries for efficiency.
What could be better: the graphics. It's a top-down view on the city, and it gets boring to look at. The music is the same jazz-style song played over and over. Since there isn't much need for sound in the game, you might want to use your own soundtrack while you play the game. I found it difficult to determine what the drive time is from one point to another, so I recommend timing it the first few times you go from one location to get a sense of whether you can make the deliveries that you pick up after 4 pm.
Recommended for: fans of sim games.
Wednesday, August 27, 2008
The Great Chocolate Chase
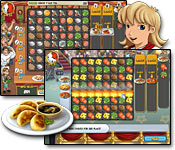
A new title from PlayFirst games, The Great Chocolate Chase is a Time Management takeoff of the popularChocolatier franchise.The player is Evangeline Baumeister, and start your first chocolate shop in Iquitos, Peru. The playstyle and strategy is similar to Turbo Pizza or Cake Mania, two successful time management games. Evangeline serves chocolate bars and chocolate sauce to customers who line up at the bar. The customers get a menu, take some time to decide, place their order, and Evangaline delivers it, then takes their money. Chain bonuses are available through multiple menu delivery, chocolate delivery, or money collection. There are 3 types of upgrades: decoration (nicer place makes for happier customers), machines (make them faster or produce more), and power-ups. The power ups either improve Evangeline's speed, increase the amount that can be charged for chocolates, or improve customer tips.
Of course the main goal is to keep the customers happy. The happiness level is indicated by color and lines of the box around the picture their order. I found this to be a little more difficult to interpret than the typical shaded hearts. As with most time management games, the more satisfied the customer, the bigger the tip. Angry customers will leave the store. Each level has a minimum amount of money the player must earn to move on.
What they did well:
Each level begins with a short journal entry written by Evangaline. Some of these entries contain important information about customers and their level of patience. Other entries are "quests" where a certain goal must be met (such as serving 3 people in a row or earning master level dollars on the level) in order to unlock ingredients. This is similar to the Chocolatier games, where the player runs across characters who give recipes and ingredients once the player has met certain goals. In The Great Chocolate Chase, however, the player only has that one level to meet the goal and unlock the item. While a player can complete the level without earning the ingredient, that ingredient will never become available. The story line is a very fun part of the game.
There are many achievements to unlock, and the player starts earning them very quickly. There is even a dubious achievement for discarding items! This system is very rewarding to players who like to earn achievements.
For fans of Chocolatier, players create all different types and flavors of chocolate, starting with plain dark chocolate bars. In later levels, other types of chocolate (light, medium) are added, as are fruit flavors and infusions.
They scale the levels well - the intro levels are easy to manage, and the later levels have just the right amount of hectic action to be fun.
What could be better:
I found that I had a difficult time telling the banana from the Amazonian spice in the dark chocolate. That was the most frustrating part of the game for me. Also, the system of showing the customer satisfaction wasn't terrific, and the background music was mediocre.
Otherwise, The Great Chocolate Chase is a decent time management game that players of Turbo Pizza, Cake Mania, or fans of Chocolatier will like.

Monday, August 25, 2008
Go-Go Gourmet, Chef of the Year
Go-Go Gourmet: Chef of the Year is the second in the Go-Go Gourmet titles. In this one, Ginger is competing for Chef of the Year against 7 of the world's best chefs.The play style is exactly the same as for Go-Go Gourmet - a mixture of hidden object and time management styles. The added twist is a like reality cooking show, where judges score the recipes (based on speed). Final point totals given each chef a placement. Chefs can even be eliminated! Go-Go Gourmet, Chef of the Year differs from the first one in that items no longer move around the kitchen like they did in Go-Go Gourmet. Each country's kitchen has a different layout, but the items are fixed.
Collectibles are plentiful. Every time the player places first, there is a bonus. Either an upgraded item (fry pan, chopper, etc), a collectible (vases, teddy bears, etc), or a bonus chef's outfit are added. The bonus outfits give different boosts - one makes Ginger faster, one adds bonus points to each delivered dish, and and one makes the judges more patient. There are even printable recipes that can be unlocked.
At each stage in the game, Ginger starts off with the basic kitchen, and must place first to get the bonuses for each country. In between the addictive, fast-paced finding and cooking, there are cute cut scenes where Ginger interacts with the other Chefs. There are also bonus rounds, which might involve placing items in their correct locations, collecting all of the items on a list, or picking up all of a specific type of item.
Go-Go Gourmet, Chef of the Year is similar to the original game (even the music is the same), but it is enlivened by the judging aspect. Its fast-paced levels are very addicting.

Sunday, August 24, 2008
Jane's Realty
Jane's Realty, the third time management game in the Jane's Hotel series, has the player moving on from being a hotelier to developing an entire city.For each new level, the player must first purchase a water and electric power station. Based on the buildings being built, these stations will need to be upgraded. The building system works very similar to Build-a-lot. Land is purchased, cleared if there is junk on the land, and the houses are built. The interface system is also similar to Build-a-lot, where the player gets to pick what buildings to raise on the lot.
Once a house is built, the player furnishes the house. Each item has a heart level; the heart levels increase the amount of rent that a renter will pay. The longer the player takes to decorate, the "rent meter" goes down, so place the items quickly!
There are 25 levels. The interface is much better than that of either of the Jane's Hotel games, but is, in my opinion, too similar to Build-a-lot. However, I found Build-a-lot to be much more engrossing and challenging.
Monday, August 18, 2008
Restaurant Rush
Restaurant Rush is a sequel to Burger Rush, where the heroine, Heidi, wants to open a cooking school. Unfortunately for her, the dastardly World Culinary Federation believes burgers aren't sufficient to teach "fine cooking" and require her to open new restaurants and create world dishes. The profits Heidi earns will how she will earn approval.Restaurant Rush offers new and exciting opportunities. The most exciting one to me is that there are different endings based on the level of profit earned. So player skill and determination will make a big difference. There are new upgrades, including a Farmer's Market, where Heidi can improve the quality of the produce and meats, increasing the value of a recipe.
Upgrades occur via tokens. Tokens, as in Burger Rush, appear in the match screen, are earned by meeting level goals (extra tokens are gained by passing the Expert level), via bonus rounds (cook-offs, where you match items to make recipes against the clock), meeting specific goals for a level (such as serving 5 iced teas), and bonus items like a cash register in the match screen.
There is a lot of opportunity for strategy to figure out which is the most important: new recipes, upgrading side dish items such as tea and soup (players can upgrade both the quality and the number of matches it takes to unlock the side dishes for delivery), food quality (at the Farmer's Market), treats to keep the customers happy, desserts, and upgrading the Jukebox, which has different songs.
It also is fun because there are various cuisines. This means the player must choose recipes for each cuisine type as well as invest in cuisine-specific treats. I know my customers have been very happy munching away on some fortune cookies when Heidi is serving Chinese.
There are more than 50 recipes to purchase and 80 levels (via both gameplay modes). Restaurant Rush is a fun, engrossing match three game, and is highly recommended.
Happy cooking!
Sunday, August 10, 2008
Forgotten Riddles - Moonlight Sonata
Forgotten Riddles: The Moonlight Sonatas is a hidden object game, but is a bit genre-bending, similar to Mystery Case Files: Madame Fate™. Currently, Forgotten Riddles: The Moonlight Sonatas is exclusively offered from BigFishGames, and is a top download.In Forgotten Riddles: The Moonlight Sonatas, you are an investigator assigned to solve the mystery of the Opera House, which used to be the home of famous composer and child prodigy Francis von Amadeus. People have reported seeing a ghostly, gaunt figure and to hear music playing at odd times.
Fans of hidden object games will feel right at home. Instead of giving a list of objects to find, there are musical symbols at the bottom of the screen. Players select them to get a clue. From that clue, they locate the object. For example, one of the clues reads "On a pedestal golden I'm Earth recreated; I display every country whenever I'm rotated." The player finds a globe and clicks on it.
When starting the game, players can choose two levels of difficulty: archaeologist (harder) and apprentice (easier). Interestingly, players can not read through all the clues, then click on the items in succession. The correct object is the only one that pertains to the current riddle. There are no points given or special rewards for fast selection. Players advance from one chapter to the next by solving the correct number of riddles(finding items).
The chapters have sufficient amounts of time, even in the archeologist category. Time wise, they provided 45 minutes to solve 40 riddles. There is a hint compass that starts with 5 hints. Random clicking results in a 40 second penalty.
One of the ways Forgotten Riddles: The Moonlight Sonatas is different from most other hidden object games are the puzzles that must be solved to unlock rooms. For example, on the first chapter, there is a stage scene, with items underneath the scene. The player must place the items in the correct places for the scene to change. Not all of the objects can be placed immediately, as the scene will dynamically update. Once the puzzle has been solved, the objects to be found will be located in the unlocked room or on the previous scene. There is a button at the right hand screen corner to switch back-and-forth. Another difference is that the hidden object, once found, does not become removed from the picture.
I found Forgotten Riddles: The Moonlight Sonatas to suffer from some repetition, primarily because of the setting. Using only one location (the opera house) was a bit limiting. Also, the story felt almost like an afterthought, as it wasn't well integrated into the game itself.
Overall, Forgotten Riddles: The Moonlight Sonatas is a good game and should please fans of hidden object games.

Thursday, August 7, 2008
Fairy Jewels 2
Fairy Jewels 2, recently released for download from Big Fish Games, is billed as an marble popper. I found the play style to be more like Peggle than Zuma.In Fairy Jewels 2, you are a powerful sorceress who luckily manages to come along at the time that a fairy city has been destroyed. Your job is to free the fairies from their bubbles, which you do by shooting colored stones to clear the stones that surround the faries. The levels are timed. Shooting stones that do not connect with any other surface subtracts points from your score.
Of course, there are bricks and metal that block your way. You have to use angles off the bouncy side walls in order to free all of the fairies. I confess that I ended up playing through the 3rd level twice because I ran out of time!
Another task is to collect coins to help rebuild the destroyed cities. You "collect" the coins by shooting a stone at the coin and hitting it. Coins left on the level when the last fairy is released count as 25 points towards your score, but do not count for your coin total. There are also bonus rounds to collect additional coins.
Upgrades are available as the levels progress, including color rockets that you hit with a stone and change the color of the rows in the direction of the rocket blast (use these to get rid of bricks in the way); bombs, which blow up bricks (but not metal); and morphers, which become the color of the stone you shoot.
Overall, the music is well-done, especially compared to the world of most casual games. The dialogue left something to be desired from my standpoint, but I see this game becoming as addicting as Peggle.
Enjoy shooting!
Subscribe to:
Comments (Atom)
