
 Posts


Wednesday, February 10, 2010
Updated directions for Mafia Wars toolbar bonus without install
The Mafia Wars toolbar sits at the bottom of your browser and maintains your stats. But, if you're like me, you don't want to install another toolbar on your browser. (I also did not like the privacy policy as listed for the toolbar). Here are some steps to get the bonus without having the toolbar installed. This works as of 2/10/2010.The first time you do this, if you have not installed the toolbar, you'll receive an achievement and the "utility toolbelt".
You'll either get a 25% mini energy buff based on your current energy value (so use wisely) through the toolbar or a bonus to your stamina.
STEP 1 - click this link
http://toolbar.zynga.com/
STEP 2 - A screen will appear with the option to install either the Farmville or Mafia Wars toolbar. It will ask you to login to Facebook. (If your login is set for "remember", it will automatically log you in.)
STEP 3 - Click this link
http://toolbar.zynga.com/click.php?to=mwgamestatsplaynow
You should receive the following message: "Congratulations! You received a Mini Energy Buff which increased your Energy by 25%, from using the Mafia Wars Toolbar!"
Note: if you have claimed this in the last 8 hours, it will not work.
STEP 4 - Click this link to log out of the toolbar
http://toolbar.zynga.com/game_iframe_proxy.php
Good luck!


Friday, January 29, 2010
Mafia Wars - Money Laundering Link
Trying to launder money in Mafia Wars, Facebook version? Here is a link that will work:http://apps.facebook.com/inthemafia/track.php?next_controller=index&next_action=moscowrainingrubles&zy_track=newsfeed&ztrack_category=moscow&ztrack_subcategory=raining_rubles_event&&next_params=%7B%22skip_interstitial%22%3A%221%22%7D
Mafia Wars Facebook: Get boost without installing toolbar
Edit: 2/10/2010 Please see updated post. It works a little differently for me now.There is a 25% mini energy buff through a "utility toolbelt" that Mafia Wars gives for installing their toolbar.
If you're like me, you don't want to install another toolbar on your browser. Here are some steps to get the toolbelt without having the toolbar installed. This works as of 1/29/2010.
STEP 1 - click this link
http://toolbar.zynga.com/game_iframe_proxy.php?playing=true
STEP 2 - A black screen will appear. There will be a button that says CLICK HERE TO LOGIN. Do so.
STEP 3 - A pop up screen will appear (even though I have pop-up blockers, mine still popped up). Click CONNECT
You'll see a screen that says:
Either "Toolbar does not exist." or "Sorry, the toolbar you are looking for does not exist."
"Would you like to create your own toolbar?"
IGNORE THAT SCREEN AND COME BACK TO THESE DIRECTIONS.
STEP 4 - Click this link
You should receive the following message: "Congratulations! You received a Mini Energy Buff which increased your Energy by 25%, from using the Mafia Wars Toolbar!"
Note: if you have claimed this in the last 8 hours, it will not work.
STEP 5 - Click this link to log out of the toolbar
http://toolbar.zynga.com/game_iframe_proxy.php
Good luck!
Long Time, No Posting
Apologies for the long delays in updates and posts. I'd been pulled away due to some health issues and got involved in many of the Facebook social games. I'll drop some tips and tricks that I've learned for those as well.Friday, April 10, 2009
Amazon Sale on Downloadable Casual Games - Buy one, get one free!
Until April 11th, Amazon is offering a buy one, get one free sale on 318 different titles of downloadable casual games. With prices between $6.99-$9.99, it's a better deal than even being a member of a games club!Click here to go to the downloadable game site.

Games are mostly puzzle, but there are a few action ones as well. Again, with 318 titles to choose from, there is something for everyone.
Details: download the first game from Amazon. You will receive an e-mail with a code to redeem for your free game. The e-mail coupon will expire 5/31/09.
Happy bargain hunting!
Saturday, March 28, 2009
Spa Mania sale
For a limited time, get Spa Mania, a time management game, for $.99 from Big Fish Games! Use code: SPA99MANIA.
Sunday, March 8, 2009
Big Fish Games: Special Pricing for Bigfishgames.es
Big Fish Games is pleased to announce that we're running a special promotion to celebrate a wonderful anniversary. Our Spanish portal was launched one year ago and we want to share our happiness with our users by offering 40% off all games on Bigfishgames.es!Click here to be transported to the Spanish-language website. Use the coupon code ANIVERSARIO to receive the discount. (Discount is good through March 14, 09)
Happy Gaming!
--------------------------
En español (lo siento para la traducción; Todavía estoy trabajando en mi español):
¡Hola! Big Fish Games (Los juegos grandes de los pescados?) están satisfechos anunciar que funcionamiento una promoción especial para celebrar un aniversario maravilloso. ¡Nuestro portal español fue lanzado hace un año y queremos compartir nuestra felicidad con nuestros usuarios ofreciendo el 40% de todos los juegos en Bigfishgames.es!
Chasque aquí para conectar con el Web site. Utilice el código ANIVERSARIO de la cupón para recibir el descuento.
Esta oferta expira 14/03/2009.
Sunday, March 1, 2009
Mystery Case Files: Return to Ravenhearts Walkthrough, Part 2
Part 2; this is a continuation of the earlier post fo Mystery Case Files: Return to Ravenhearst™. A link to the earlier post can be found hereBase of well:
The door opens to the base of the well. There is a bucket; use the long stick to unhook it. Time to leave. Don't worry about the ring in the floor for now.
Path in front of the manor:
Head back to the well in front of the manor. Turn the crank and raise the bucket; take the rusty knife that is inside.
School house:
-Head back to the schoolhouse. Look at the cellar door; there is a temperature carved into the front of the door. You'll return in the next steps to solve the disk pattern; don't worry about it now. The dripping gas tank can't be fixed yet either.
-Go back to the toy store, where there is a hot stove.
Toy Store:
Find a potholder and turn the knobs until the temperature is correctly set to the one on the cellar door by the schoolhouse. There is a pattern on top of the stove.
-Head back out to the school house cellar door.
School house:
-Turn the disks to match the pattern from the toy store stove. Once the disk combination is correct, pressing the button will open the doors and take you into the cellar.
Cellar:
-Finally, the machine belt comes in handy. Notice the sharpening stone: the machine belt will fix that.
-Sharpen the rusty knife (and hope you had your tetanus shot recently!)
-Back to the toy store.
Toy store:
-In the basement, use the knife on the bear. A box of matches will be excised.
-Head to the gingerbread house.
Gingerbread house:
-All you need here is the empty jar.
Cellar:
-Use the jar to collect gas from the tank.
-Go through the toy store and through the new door to the base of the well.
Base of well:
-Click on the rope from your inventory to attach it to the ring on the floor. Head down the rope into the well.
-You'll come across a puzzle on a door. Match the symbols that appear. In this game, speed is of the essence: if you take too long, you fail and the puzzle resets. I haven't yet been able to count the number of correct matches open the door, but it's more than I expected.
Well:
-Using the matches and the tinder stone, light the room. It will have 3 puzzles.
-Hint for the crest with the holes and lines puzzle: With the mouse, trace a continous line through all the lines without backtracking (mousing over an area where you've traced before).
-After the cutscene, go back to the toy store.
Toy store:
-Search the display case again. Find the letter "R".
-Back to the room with the three puzzle doors.
Puzzle room:
-The door on the right has a typewriter. Type "Victor" (the anagram for the typewriter letters you've been collecting throughout the game) for the door to open.
Tram room:
-Notice the stuck fuel box. Use the screwdriver to to open the fuel box; pour the gas from the jar into the tank.
-Search the trestle above and find a putty knife.
-Head into the tram and pull the lever. Down you go!
Beach:
-The tram will take you down to a beach. Search the shipwreck; you'll find a key among the hidden objects.
-Go towards the stairs.
Stairs:
-Look at the steps and use the putty knife to scrape away barnacles. There will be a group of raven symbols. Write down the order and head back up the stairs.
Upstairs:
-Like the Grand stairs in Moria, this is an impassable chasm. But wait! There is a panel west of the waterfall.
-Slide the tiles around - they will always slide in the direction of the beak. Match the raven pattern with what was in the base of the stairs.
-Voila - a bridge rises. Now, cross the bridge (over troubled waters) to continue climbing the stairs.
Cottage:
-At the top of the stairs will be a cottage. Use the key to enter.
-Turns out Victor is home. Perhaps you should've knocked or brought cookies!
Attic:
-Well, now you're tied up and in the attic! Time to get MacGyver. Search the pram (baby carriage) for a bobby pin and pick the lock on the trap door.
-Climb down the ladder, then go to the library to the east.
Library:
-Look at the book on the desk and take the knob.
-Make sure to search the bookcase and find a film reel.
-The Victrola doesn't work yet.
-Go back to the hall and enter the left room.
Theatre:
-Put the reel on the projector.
-Place the knob on the projector. Turn it to activate the movie.
-Watch the movie and note the symbols on the book jackets behind him.
-Notice the boarded window. You'll be back for this.
-Back to the attic.
Attic:
-Search the carriage/pram again for a record.
-Back to the library.
Library:
-Play the record on the Victrola.
-Rearrange the books on the bookshelf to match the order of the symbols from the film.
-Once the symbols are correct, the bookshelf moves and opens a secret area.
-Pick up the axe and go back to the theatre.
Theatre:
-Use the axe to bust through the boards on the window and escape.
-Head back to the cottage via the well and tram.
Cottage:
-Click on the shed door. A dominoes puzzle will block progress. Match each domino combination to solve the puzzle and open the door.
Shed:
-Search the shelves; find a jeweled heart. Back to the cottage.
Inside cottage:
-Go to Victor's bedroom (upstairs). Examine the dirty frame on the wall. Clean it with the cloth. You can other items here right now.
-Note the symbols at the bottom of the admission letter.
-Downstairs, use those symbols to open the door on the right. You need to click on each skull in the order it appears on the bottom of the letter.
-Study: Search the table; take the skull key. Use the key on the chest, which gives you another puzzle. Rotate the stars until you get an image of a peacock. Take the telescope.
-Back to upstairs bedroom. Put the telescope on the tripod. It will focus in on the weathervane on the mansion roof. The code will be important later.
-Head back to the tram and return to the general store.
General Store:
-Go straight to the elevator. Use the skull key on the locked box. Use your casebook to compare the shapes to the playing cards. You will need four 3 digit codes.
-Elevator locked compartment puzzle solutions: club (from weathervane): 300; diamond (from school house board): 006; hearts (from plaque in front of Manor): 076; spade (from the buoy): 005.
-Enter the correct code and the elevator will descend to the bottom.
Hallway:
-The room to the east has a statue. Take the locket from the statue of Emma.
-The door on the left has a place for ten jeweled hearts. Put the locket in the door, then explore the mansion, finding all 10 hearts. (hint: search all the sparkly areas). This step took me quite a bit of time. From what I understand, the heart locations are completely random.
-Once you have all the hearts, return to this area and place them in the door. The door will open.
Final room:
-The control panel! This is what is supposed to end Charles' reign. Hint: you want to have a numerical sequence from 1-17. Sometimes moving to the other side may be the best way to get things in order.
Enjoy, and please feel free to share other hints and tips in the comments!
Thursday, February 12, 2009
Mystery Case Files: Return to Ravenhearst Walkthrough
Mystery Case Files: Return to Ravenhearst™ hidden object game and puzzle hints:Overall hints:
Sparkling areas mean there is an item to be found, so search the entire areas for scene or a light glinting off an object
This game has unlimited time - therefore, you also have unlimited hints if you're patient enough to wait for the crime computer to reset! When stuck, you can drag and drop objects onto the crime computer and it will give you a hint of what it might be used to do.
You can't come back to puzzles you've skipped, so make sure you don't want to do them before you skip them!
Any time you come across a significant item, it is entered into your casebook. When you're in an area that is lacking an item, always check your case files to see if you have the object already.
Walkthrough (with spoilers) begins here. This flow is what makes the most streamlined sense; you are free to wander about discover these areas in a different order.
Outside the Manor:
-Read the plaque on the left of the gate. Notice the series of numbers.
-Click the bush on the right to activate the hidden objects.
-Once you find all the objects, a wrench will be added to your inventory.
-Click on the black speaker box. Of course it doesn't work, so you must hot wire it. Open your inventory and use the wrench (thank goodness it was just lying outside the gate!) to remove the bolts from the box.
-Connect each plug to its correct socket. The numbers above the plug correspond to a column and row to tell you where to connect the wires. You must connect a red, green, and blue wire. For example, the blue wire has a 2,2 above it. Connect it from two columns over and two rows down.
-A key will appear when the wires are correctly reconnected. Use the key on the gate, and open the gate with the gate handle.
Front porch:
-Click the front door to open a hidden object scene. Look at the crescent moon symbol.
-Once the items have been added to your inventory, you will get a "V" key from a typewriter (link to help out some younger folk) .
-There is a sparkle above the porch that you can't access yet.
-Head to the left porch. Click on the trunk for more hidden objects.
-Once you've found all the items, you'll get a brick.
-Go back to the front door, and head to the right.
-Grab the ladder, and head towards the statue and pool area.
Pool:
-Search the rosebush for objects.
-The eye will be added to your inventory.
-Return to the front porch.
-Click the area above the porch. Put the ladder on the steps and click on the bird nest. Lucky you, there is another eyeball.
-Go to the right and use the brick to break the window.
Inside the manor:
-Get the crowbar (beneath the chair) and head back outside.
Porch:
-Use the crowbar on loose board (left porch).
-Hmm. A third eyeball.
-Use the chest; find the items and get a machine belt added to your inventory.
-Time to head back inside via the broken window!
Inside:
-Click the door. Place an eye in each space, and then press the level to adjust the opening. This will bring the picture into focus much the same way that a camera lens works. Once the picture is sharp, the door will open.
Kitchen:
-Maggots galore! Move the note on the wall and find the stick-bird sketch.
-Search the shelf for objects.
-You will get a cheese wedge when you've located all the items. (I don't recommend that vintage!)
-Back to the porch.
Porch:
-Look towards the ground and place the cheese on the ground to entice the mouse out. Click on him to add him to your inventory. Go back to the left.
-Front door.
-Sadly, you use the mouse as bait for the cat to get him to move.
-Take the key, open the door, and return to the kitchen.
Kitchen:
-Open the cabinet under the sink and take the shears and moist cloth.
-Use the key that you just obtained from under the cat to open the lock on the stove. Take the glove.
-Use the clippers to cut the rose, and the glove to pick up the rose.
-Time to go back outside.
Pool:
-Search the rose bush again, and take the horn.
-Give the rose to the woman statute. A crescent moon appears - compare it to your case book. Move the moon on the door to match the position in the book, and the door will unlock.
Graveyard:
-Find all the objects and get a pickaxe.
-Use the shears to cut the bushes on the right side, and work the puzzle there.
-Puzzle hints: the goal is to activate all the lights by connecting them. Rotate the layers, starting with the outer most ring, until the lights are connected. Move to the next inner ring. You will receive a sun symbol. Back to the mansion!
Living room:
-Click the mantle above the fireplace to access the puzzle. Use both the sun and moon symbols - your casebook will have the symbols. Once the correct signs are in the hands, you can pull the lever at the top of the screen.
-The fireplace moves, showing stairs that lead downstairs. (interestingly, secret passageways never seem to start out with stairs that lead up.)
Downstairs:
-When you reach the room with 3 doors, click the middle door. Flip the switch to activate the machines and start the puzzle.
-Puzzle hints: goal is to get the total on the right. You must add or subtract numbers. Once the puzzle is solved, the door will open.
Middle room:
-Search the window. You'll get a stick.
-Head out to the street.
Street:
-Take the shovel (near a beauty salon), and click on the salon door.
-Puzzle hints: arrange the columns of tiles to match the colors shown at the top. Clicking a tile slides it to an empty space.
Salon:
-Search the privacy screen. You'll find a red marble. (Thank goodness it isn't another eye!)
-Further in the salon, find the staircase banister. Rotate the heads to face the stair landing.
-This will show a painting of Rose's twin girls. Look at it closely; an angel symbol will be added to your case book.
-Head upstairs, and look under the bed. You'll locate a "C" key for the typewriter.
-The nightstand will not open yet.
-Click on the door to activate the next puzzle.
-Puzzle hints: there aren't a lot of good hints for this one. You have to rotate the board to get the steel ball into the hole. One chain turns the board clockwise; the other turns it counterclockwise.
-When the puzzle is solved, you can enter the bathroom.
Bathroom:
-Search the tub (I know you won't want to, because it's pretty dirty!), and you'll receive a lever.
-The medicine cabinet is locked.
-Head back out to the street! Apparently, washing up is optional.
Street:
-Go to the general store. Search all the shelves and find another red marble.
-Activate the cash register puzzle.
-Puzzle hints: swap the keys to that the column and row totals add up to 15. You'll get two things upon solving the puzzle: another red marble and four numbers.
-Use the code on the fuse box on the back wall. Surprise; there is a fuse missing!
-Enter the elevator. Use the lever from the dirty bathroom on the elevator control box, and click it to go down a level. (Apparently the fuse went to something other than the elevator?)
Cavern:
-Search the boat for objects, and receive a gold key.
-The grate will be too rusty to move.
-Go back to the elevator; click the lever to pull it and go back to the general store - then back to the beauty salon's bathroom.
Salon:
-Use the key on the locked medicine cabinet. Take the rust remover.
-Search the bathtub again - and find electrical tape. Back to the general store and the mysterious cavern.
Cavern:
-Use the rust remover on the grate bolts; then use the wrench to loosen them.
-Head through the tunnel to the bats!
-Use the horn to wake the bats so you can go further.
-At the end of the cavern, you'll find a body in a machine.
-Solving the puzzle frees Rose. Examine the coffin and find yet another red marble (#4).
-Head back to the pool and statue areas of the manor.
Pool:
-There are still things left in the rosebush. Inspector, you may need to work on your powers of observation. Take the screwdriver; open the door and head down the path.
Garden:
-Find the X and dig with your shovel. You'll find a missing piece of the painting. Back to the beauty salon!
Salon:
-Place the torn piece back on the painting. It will show the twins underneath colored marbles - which you may remember appears on a door puzzle in the room after the secret passageway. Head back there.
Secret passageway room:
-Puzzle (door on the left): Place the red marbles into the empty spaces. Using the two buttons, rotate the marbles until you have them lined up: orange on top, four reds in the middle; three blues on bottom.
-Head into the playground.
Playground:
-Search the sandbox. Take the funnel.
-There is a school without power.
Toy store:
-Search the display. Take the fuse, and go through the back door.
-Search the workbench; find the hammer and go downstairs.
-Click on the cloth-covered heap to reveal a game.
-Puzzle hint: click on the green or purple trolls to get a score of 100. Hitting a red troll will subtract points. Once solved, you will receive a coin.
-A fuse box has a lot of bugs.
-Back to the beauty salon and bedroom!
Salon:-Nails are hammered into the drawer to keep it shut - use the hammer
to open it. Take the paint remover.
-Head back to the front room and privacy screen. Find the hidden objects, including the "M" key.
-Back to the general store!
Store:
-Take the fuse from the toy store and place it into the fuse slot. This will activate the electricity for the school room.
-Head down in the elevator to the tunnel.
Tunnel:
-Use the telescope in the tunnel - the red button will reveal a slot for a coin. Put the coin in to activate the telescope.
-Adjust the knobs and use the eyepiece - focus on the buoy. The pattern on the side will be added to your case files.
-Search the boat again, and collect the "T" key.
-Use the elevator to go back to the general store.
Store:
-Search the shelf and find the "X" key. Back to the playground.
Playground:
-Enter the school and take the bug spray from the desk.
-Use the paint remover on the chalkboard.
-Numbers will be underneath and will be added to your case file.
-Gingerbread house puzzle: rotate the circles until the painting is aligned and oriented properly (upright).
Gingerbread house:
-Take the potholder.
-Click the box on the right wall - use the electrical tape to fix the damaged wiring.
-Press the red button and the dumbwaiter will activate - when it gets to you, it will have some rope. Take the rope.
-The door at the end of the hall has a memory match puzzle.
-Search the house to find the "S" key.
-The door in this room needs a knob.
-Back to the toy store.
Toy store: search the display case - get the doorknob. Back to the
gingerbread house.
Gingerbread house:
-Use the doorknob.
-Click on the flower picture. You'll find a number on the back. Record it.
-Back to the toy store
Toy store:
-Head to the basement. Use the bug spray to kill the bugs on the box.
-Repair the phones by lighting every point on the circuits. You can reset as many times as necessary.
-Once repaired, go to the workshop and call the number from the back of the poster; the workshop door will open.
For the rest of the walkthrough, click
here.
Shop-n-Spree
Shop-n-$pree is a hidden object game. While the company bills it as a time management game, the time management is similar to most hidden object games, where one must find all the objects within a certain amount of time.The backstory: Your long-time family department store has seen better days. A shopping super-center comes into town and tries to buy up your lot for additional parking, you enter with your buisness degree to the ailing family business.
Game play: You find the objects that the customers order. You will have a maximum of 3 customers at a time. Some of them will have text (red pillow, blue slippers), some will show you a picture of what they want, some will have a a request and timer (i.e. Give me all the globes you have, and the timer starts running - you have until the timer runs out before the customer gets angry and leaves); some have a "riddle" (My nephew wants 3 green stuffed animals).
What they did well: As the different levels load (bathroom, sporting goods, boy toys, etc), there is a box that lists a bunch of items with their prices and pictures. The items don't vary from this list, so if you don't know what something is (for example, you've never done rock climbing and don't know what a carabiner looks like), this could help out.
What could have been better: Sometimes the photographer customers had a picture of what they wanted that was not the same as the actual item! There was no reward for finishing a level early. Upgrades are not choices, but given after a certain number of levels. The upgrades don't affect gameplay. It gets tiresome to listen to the customers says "Okay" and "Thanks" over and over.
Overall: This was not a game that I found very compelling, but think it's best targeted to younger players.
Friday, January 30, 2009
Cassandra's Journey: The Legacy of Nostradamus
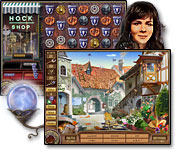
Cassandra's Journey: The Legacy of Nostradamus is a hidden object game, created by Joybits. You are the granddaughter of a famous fortune teller, and it seems you have inherited some of her talents.Gameplay: It's a standard hidden object game. There are hints (that don't always work correctly; see below) that highlight items if you can't find them. You can purchase additional hints after finding enough gems. When looking for differences in some of the pictures, consider things like color, shape, size, and location. On one, I could not spot the sandwich on the table. :)
Mini-puzzles:
1) Prophecies: Hangman. There is a random quatrain that you must decode in less than 10 errors.
2) Jigsaw: It's really a switch place, not as much a jigsaw. You click a piece, then select another piece where you want to place it, and the two tiles will switch places.
3) Rune Concentration: Memory match. Flip two cards; if they match, they will disappear.
4) Rune Match: Find an adjacent combination of 2 (or more runes). Once a combo of tiles are selected, the tiles will turn from red to green to complete the puzzle. You can shuffle the tiles 3 times.
5) Tarot: You must unscramble 4 Tarot cards from the moving ones in the frame. This is how I solved it: I placed the cursor in the middle of the large left frame until a card fragment appeared. I then moved my mouse slowly, and a card started to take shape, sort of like a jigsaw. It will look like a central part joined by 4 other pieces - then click and drag it out of the frame.
6) Lock: You direct fire balls at the locks, using the fleur de lis tiles. As an additional hint, the flower tiles teleport the fireball to another location.
What they did well: there is a nice mix to the type of hidden object games. The mini-games were relatively fun. The art was good.
What could have been better: The story. Frankly, the story was terrible. There were spelling errors and sometimes it made no sense. Clicking through the text was painful at times. I found several bugs: sometimes there would be something that would fit the item description, but only one was correct. The hint button did not always work correctly, especially when down to the last two objects. It consistently would not highlight the object, which was very frustrating. The "divinations", which unlock as you progress along the story, were disappointing.
Overall: It's a decent game, one that fans of astrology and hidden object games might like. If you like a good backstory, this would not be a game for you.
Wednesday, November 5, 2008
Parking Dash Tips & Tricks
Here are some hints that I found useful in trying to hit expert on all the levels or Parking Dash. Good luck! If there are any tips that I missed, please feel free to add them in the comments!Basic strategy:
- Cars can ONLY be placed in the exit spot when their driver is there to claim it.
- You can move and repark cars in different spots to get at a car that is parked deeper in the lot.
- Every time you park a car in a spot, the space turns the same color as that car, and a number appears. This is the number of times you parked a car the same color in that spot. Parking a car on the same colored spot gives you a bonus and is an important key to winning the game.
- Each time you park a same colored car in that space, the multiplier increases (up to 5x).
- Color matching only counts when parking a car the first time. Moving a car from one spot to another *does not* affect the multiplier bonus.
- The radio station can give Karma a power boost when you listen to a station she likes. Turn the station when the green light starts to flash. If you're having difficulty managing everything, this should probably be your last priority!
Getting the car:
- Notice the clock over the customer's head. Park the cars in the back of the lot for the people who have the most full clocks (i.e. completely blue circle). Make sure to park these keys first.
- Conversely, park the cars with the least amount of time close to the back and exit.
- Keep in mind that you can always change which customer's car you want to park by clicking on a different person.
- When you have a large group of people waiting to park, feed them a vending machine snack to improve their patience; when they return to get their car, they will have more hearts.
Parking:
- (This took me a while to figure out!) You can park a car in the same colored spot to get a bonus, then move it immediately to a different space. That way, you get the bonus and can better manage the spots available on the lot. This is a good technique to use for the later levels that need a lot of points to progress.
- When parking cars, if you can park the same color in a same line (row) or side-by-side (column), it can make it easier to score point bonuses.
- If you have two of the same colors in a row/line, if you park the same color of limo, float, or SUV on those spots, you get a DOUBLE (or TRIPLE) bonus.
- Park SUV cars of the same color side by side to get a double bonus.
- If there is trash on the group, entrance, or a parking spot, you must clean it up before you can drive through it.
Reserved spots:
- A blue and white sign means that spot has been reserved. Drivers with reservations will only park in those spots.
- You can park the car in the reservation slot, then move it afterwards. However, if you do keep it in the reserved slot until the driver comes back, you get an extra tip.
- You can park cars in the reserved spot (that weren't meant for that spot), but move them as soon as a reserved car shows up. This is one way to set up a bonus for the reserved spot.
Driver pick-up:
- Do whatever you can to keep the customer from being angry when they leave. If they leave angry, you lose money.
- Give the donuts to the customers to make them happier.
- If there are too many customers waiting to park (you have no more spots available), deliver all the cars to the drivers waiting for pickup.
- Each customer drives a specific type of car. Knowing which car type belongs to a driver helps to maximize your time. (You can always click on the returned driver to see what car, but it takes time!) This is especially important when dealing with the love-sick man, whose car does NOT show up when you click on him.
- If you're really panicked, just pull out any car. If it doesn't go to the exit, repark and move to the next car. On later levels, it may take too much time to click on each customer individually to figure out which car is theirs.
- When you have a large group of drivers waiting to pick up their cars, feed them a vending machine snack to improve their patience; you'll get more tips.
Other:
- Try to wash all the dirty cars at the same time because you get a bonus for repeating the action.
- Once Jimmy is working for you (level 24), create a chain of car cleaning for
him by clicking him, then the cars to clean. (But pay attention to the length of time they are parked - make sure he washes the cars with the shortest time first!)
- If you're having difficulty finishing a level, try not filling all of the parking spots - that way you have an empty spot where you can move a car. Also keep in mind that if you fail a level, you can repick an upgrade - it might be worth trying a different upgrade for that level.
- Make sure to clean any debris (sand, leaves, moon dust, snow) as soon as it appears, because cars will not be able to drive through.
Customers and their cars:
Teenage girls: "Bug" car. Average speed car, patience, tippers.
Business women: Sedan style care. Fast car speed, not patient, and good tippers.
Celebrities: Stretch limo: takes up 2 spaces in the same line. Average speed, low patience, excellent tippers.
Cell-phone guy: Sports car. Sometimes the alarm goes off. Kick it to
shut it off, or it will annoy the waiting customers. NEVER park this car on a lift because you can't shut it off. Fast cars, extremely impatient, good tippers.
Al - Fast car, average patience, good tipper.
SUV driver: needs two side-by-side spaces. When possible, park against the wall. Remember to click the spot where the left wheel would go. Slower car, average patience and tipping.
Derek: Average car, driver, tipper.
Auntie Ethel: Impatient, slow car, poor tipper.
Lovestruck man: Very patient, average speed car and tipper.
Parade festival woman: Parade float needs 3 spaces in a row (and apparently
they have a lot of parades!) Slower car, average patience, tipping.
Student: Small, fast car - patient but poor tipper.
Dog owner: Leaves the dog in the car. (I found this one to be the most tricky) If you need to move the car, you have to placate the dog by giving him a treat. DO NOT click on the car again, but instead, click on the spot where you want to move the car. Try to move this car as little as possible, because you have to give the dog a treat every time.
Senior: The senior is the last new customer you'll meet, in level 36. Much patience, very slow car, poor tipper.
On the Moon:
- Be very careful with the dog owner's car. You must park it against a wall, because there are no dog treats for the first several levels.
- A new upgrade, the nitrogen tank will appear. It makes cars move faster. Click on the tank, then on the car to move. This is especially useful on the Senior and Aunt Ethel's car. Unlike other items in this game, you can't chain the nitro tank - you must click the tank then the car every time you want to use the tank.
- A cool new way to move cars: you can swap them by clicking! This allows immediate access to cars without having to drive from one spot to the other.
Upgrades:
There are 3 types of upgrade. Speed: lot (upgrading the pavement, adding cones, etc), Karma (upgraded shoes) or equipment (faster moving car lift or nitro tank). Tips: improving the look of the lot increases tips. Patience: Certain aesthetics also improve patience. I found these to be most useful in later levels, especially in the more difficult locations. All upgrades are automatic and presented as choices to you; none have to be purchased.
Hope this is helpful - and happy playing!
Tuesday, October 28, 2008
Parking Dash
Parking Dash, a new time management game from PlayFirst, the makers of Diner Dash, Flo on the Go, and Cooking Dash, is a fun and enjoyable game.You're Karma, a friend of Flo (famous heroine of the Diner Dash and Cooking Dash series), who inherits a parking lot (luckily) behind Flo's Diner. Flo encourages your entrepreneurial skills and to run a valet service instead of selling the lot.
There are some interesting twists to the time management aspect. As each customer appears, a timer is over their head. This lets you know how long they want to park. Since some spaces can blocked in, it's important to strategically place the cars that will be there the longest in those spots (and then to remember which ones will be there the longest!) Karma must keep the customers happy by picking up and delivering the car on time as well as managing the parking lot space limitations.
Play style is different from many of the dash games - more on that in a tip post to follow. There are bonuses to placing the same color car on a similar colored spot (just like sitting diners in the same color of chair). The cast of characters is the same from the dash games and have the same sort of temperaments. The businesswomen are still the most impatient. As the game progresses, there are upgrades that help improve the appearance of the lot, increasing either tip or patience level. I thought it was pretty funny to have a donut upgrade to help improve driver patience. Bonus points are scored by performing a series of events (parking cars, delivering cars, washing cars). The happiness of the customer is designated by their face. Big grin: happy. Small smile: content. Unhappy: red. Upgrades are choices at the beginning of levels and do not have to be purchased.
Graphics are very similar to other Dash games. I did love how the "bug" style cars have a little purple heart on top.
There is a radio station that plays music and you can change the channels a la Grand Theft Auto. This has no bearing on the satisfaction of the customers, but is a welcome addition to listening to the same music over and over. It does add a boost of speed for Karma, and can add to the hectic pace of some of the later levels.
What they did well: As in many of the Dash games, you get to see familiar faces - like Flo and Quinn (from Wedding Dash). The puzzle piece of placing the cars in a way that is accessible is a nice and different twist on time management games. Again, having the radio station dials is also an improvement over the same music.
What could have been better: The upgrades were not very compelling, and there weren't achievements to unlock. Not having hearts to show the happiness of the customers is such a different take for the Dash games, I found it a little difficult to know when a customer was just content vs bordering on angry. Sometimes the only "hint" was the sound of tires peeling out of the lot and then the -100 flashing on the screen.
It is a challenging time management game that both new players and veteran “Dash” fans will enjoy.
Recommended for: kids, fans of the Dash series or time management games
Saturday, October 18, 2008
Time Stand Still - walkthrough under construction
I'm still working on solving the Time Stand Still game. However, I'm submitting my current walk-thru. Updates to come very soon.Home:
1.) Go to the kitchen.
2.) Read the newspaper.
3.) Locate the telephone book on the chair.
4.) Open it and find the address for SOLVIG LIEDBERG.
Kiosk:
1.) Start talking to STINA.
2.) Look at your notepad to ask Stina questions.
3.) Watch the ads Stina shows after the interview.
Katarina's home:
1.) Open the door to enter.
2.) Use the notepad to ask her questions.
3.) After asking all the questions, leave the apartment.
4.) Go to the SOLVIG LIEDBER home.
Solvig's home:
1.) Interview Solvig. She will give you house keys. These keys will be used later - enter the home when it is empty.
3.) Go to the rear door to find the hissing sound, which is coming from the radiator. You will be unable to repair it because you need a key.
4.) Enter the living room/lounge area. (move so that you are facing away from the radiator)
5.) Go to the bureau. Try to open the top drawer. It is locked.
6.) Go to the living room.
7.) Find a rectangular photograph and take the key from the underside. Replace the photo and return to the desk in the lounge.
8.) Open the drawer with the key. Keep the wood plug, radiator key, and two pictures.
9.) Look at the photos, especially the differences (a window is removed in the later picture).
10.) Go to the kitchen and read the note on the table.
11.) Take the coffee mug.
12.) Return to the radiator area and place the mug in the left corner, just under the keyhole. Place the key in the hole to release steam.
Kiosk:
1.) Talk to Stina about Carl Bergsten, asking all the questions in the notebook.
Katarina's home:
1.) Ask about Carl Bergsten.
2.) Look at your map as you leave - there is now a new location.
Museum of Design:
1.) Read all of the panels.
2.) Go to the computer. You'll need a token to turn it on.
3.) Look for the panel that has 17 boxes. It will be a memory match game. Once you've matched the shapes, you'll get a ticket.
4.) Write down the colors and shapes below the ticket. You'll need this information later to open the puzzle box at Solvig's house.
5.) Go to handicraft exhibit (via the stairs) and use the ticket in the door slot.
6.) Find and take a small dowel on the floor (between 2 wheels).
Solvig's house:
1.) Return to the desk and open the top drawer.
2.) Select the puzzel box. Use the dowel and place it in the hole in the bottom right corner.
3.) Use the color/shape sequence from the ticket to solve this puzzle. Alternatively, you can bypass the puzzle (or return to the museum and write down the shape/color sequence.) (note: I believe the solution is always the same: red pentagon, yellow circle, blue pentagon, yellow pentagon)
4.) Once you have the correct order, a lever will activate, but you need to clik on the box to open it.
5.) Take the blueprints.
6.) Look at the couple's photo in your inventory, then look at the blueprints using the magnifying glass. A X will mark the spot in an upstairs room.
7.) Go to the sitting room and click the cabinet with glass panels. The cabinet will move, but the room can not be opened yet.
8.) Head downstairs and look at the diploma from the herb garden.
Kiosk:
1.) Ask Stina questions from the notebook.
Herb garden:
1.) Talk to the gardner and get 5 herb cards.
2.) Solve the puzzle. (Bypass or place in the correct order: thyme, rosmary, lemon balm, oregano, absintium, creeping thyme)
3.) Talk to the gardner.
4.) Enter the house.
5.) Look at the calendar.
6.) Speak with the gardner about Simona.
7.) Find Simona in the garden.
8.) Ask Simona your questions.
9.) Pick up the yellow jacknife from the ground.
Solvig's house:
1.) Go back to the sitting room and move the cabinet.
2.) Use the knife on the wallpaper to tear it. Use it on the wall
again to make a secret door appear.
3.) Enter the room.
4.) Read from the book on the table.
5.) Exit the house and look at the map - notice a new location.
Library:
1.) Use the computer. Use the mouse to read the entire article.
Solvig's house:
1.) Read the note on the front door. Take the attached key and chewing gum.
2.) Use the key on the padlock to open up the hut.
3.) Take the flashlight.
4.) Enter the shed.
5.) Take the batteries from the bench.
6.) In your inventory, drag the batteries over the flashlight. Voila - light.
7.) Go back to the secret room in the sitting room.
8.) Use the flashlight.
9.) Read the paper. Read all the papers, but most importantly the autobiography notes.
10.) You should hear a creaking sound as you're reading the papers.
Click on the carpet and it will lift up to show floorboards.
Library:
1.) Use the computer. Find the new topics - two articles about Dietrich Gunter's body. These articles have some important plot points.
2.) As you leave the library, notice that you have a new location on your map: Mona Redvall's house.
Mona's house:
1.) Examine the keypad. The most worn keys are the ones you need for the code. I believe the solution always is 1,0,2,9.
2.) Once the green light appears, open the gate.
3.) Ask Mona the questions on your notepad.
Herb garden:
1.) Don't enter the lodge, but head to the deck.
2.) Take the fishpole.
3.) Walk by the lake.
Museum:
1.) Don't enter the museum. Find the shiny token (below the bridge left of the museum pathway).
2.) Use the fishing rod and chewing gum to get the token.
3.) Enter the museum and use the token on the computer.
4.) Read about Carl and the buildings he designed.
5.) Notice St Olof's school on your map.
St Olof School:
1.) Try to talk to the janitor. (He won't talk to you now).
Home:
1.) Use the phone to call Solvig. Ask questions. You'll need to find a lost key and clock.
Solvig's house:
1.) Look at the green shrubs beside the house. There will be no key.
Katarina's house:
1.) Interview her.
2.) Ask to borrow her son's metal detector. (Oddly, this places you directly in his room; you don't have to navigate there.)
3.) Look at the orange box on the dresser. You'll need to finish a puzzle to open it.
4.) Look at the computer game boxes. click on the top box to move it - read the post-it note.
5.) Look at the orange box. Open the Guitar Basics book in an open drawer. Write down the musical notes.
6.) Go to the guitar and pluck the strings in the right order. (light blue, yellow, green).
7.) Press the buttons in the same order on the orange box.
8.) Click on the box to open.
9.) Take the metal detector.
Solvig's house:
1.) Use the metal detector on the bushes next to the door.
2.) Take the key.
3.) Enter the house and go to the living room, to the chest.
4.) Use the key to open the left drawer.
5.) Take the pocketwatch.
Herb garden:
1.) Talk to the fishing gardener.
2.) Go to the river.
3.) Find the crowbar in the river.
4.) In your inventory, drag the metal detector over the fishing rod. Place that in the water.
5.) Take the crowbar.
6.) Talk to the gardner and ask for permission to take the crowbar.
He asks for salvinia from the water garden.
Home:
1.) In the kitchen, open up the cabinet and take a glass. Fill it with water from the kitchen sink.
2.) Water the basil plant in the kitchen window.
3.) Fill the glass of water again.
4.) When leaving your apartment, notice that you have a new location on your map: the water garden.
Water garden:
1.) Find the salvinia. Place it in the drinking glass.
Herb garden:
1.) Give the gardener the salvinia in the glass. Take the crowbar.
Solvig's house:
1.) Go back to the sitting room; move the cabinet and enter the secret room.
2.) Move the rug and use the crowbar to pry up the floorboards.
3.) Select the box that says JUGO. Read the letter. Notice the birth date.
4.) Replace the items.
5.) Go back to the living room chest.
6.) Solve the watch puzzle.
(watch puzzle steps: 1. depress the top left knob and run through all the numbers in the bottom left window. 2. Do the same thing for the top right knob and right window. 3. The numbers are the days per month and months per year. It's backwards from American notation (so it's dd:mm) 4. Use the birth date from the letter. (16:9).)
7.) Flip the watch over and open the back. There will be another puzzle.
Peggle Nights
If you were one of the many original Peggle addicts, you will definitely enjoy PopCap Games' sequel Peggle Nights.If you're not familiar with the game, the player fires a ball at the top of the screen and watches as it falls to the bottom, hitting and bouncing from peg to peg. The purpose is to remove all of the orange pegs before you run out of balls - each level starts with a specified number, usually 10. At the bottom of the screen is a moving "bucket" - think of a Pong paddle, except this bucket can catch the ball. If it's caught, it's a free ball, otherwise, you lose it. There are bonus pegs - green ones that may give you an additional ball or a shoot guide (shows which peg you'll hit and how it will bounce), and purple ones that are point bonuses. If you score more than 25k in one turn, you get a free ball. As the ball heads towards your last orange peg, you get a slow motion, zoomed camera and Beethoven's Ode to Joy. Fireworks go off, the ball bounces around until it hits a bonus bucket that ranges from 10k to 100k points. (Unless you clear the screen of all blue pegs, which gives you a bonus, and the buckets at the end are all 100k.)
The only control you have once you've pointed the launcher and clicked to release the ball is that you can right-click to speed up the bucket. This is both fun and frustrating!
You can choose to play the adventure mode, 5 levels for the 12 characters, or a challenge mode, also with 60 level, that have a challenge goal, such as having the lowest score. I found I was good at that one. The player must unlock the challenge mode by playing the adventure levels. There is also an option to have Quick Play game of any completed level as well as Duel mode, where you can play 2 player on the same computer (either with another live body or the computer).
This Peggle introduces new ways to replay shots as well as a trophy room. It also adds a new Peggle Master at the end (but no spoilers here!) The cute characters (excuse me, Peggle Masters) all live out their dreams, which comprise the backgrounds of the Peggle levels.
What they did well: They didn't name it Peggle 2. While it's a sequel, if it were Peggle 2, I'd probably expect a little more. The background animations of some of the levels are simply awesome. Both the pumpkin hand-drawn versions of paintings and the lab backgrounds are my favorites. Playing against the computer in duel mode is hella hard, but is a great, fun challenge. It does seem at times the computer has some sort of inside advantage. The powerups are all different on different characters' levels. For example, the green pegs sometimes give an extra ball. Other times, you get a "flipper" like item to hit the ball to keep it in play, much like pinball. While I get very tired of repetitive things, it's amazing how much I love the drum roll, slow motion camera as I hit my last orange peg. It's great feedback!!
What could have been better: It's like a Peggle add-on. Some people may not be delighted that it's not very different.
Recommended for: fans of Peggle, arcade games, and anyone who likes fun.

Friday, October 17, 2008
Cake Shop
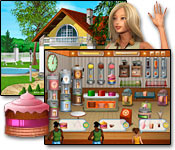
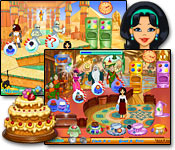
Cake Shop, a time management game from Elefun. You are Emily, a recent college graduate. An underwhelming cover letter lands you a job managing a cafe.Customers come in and their menu choices are displayed in a chat bubble. You'll prepare a layer cake, with one of three cakes, a filling (jelly?!), and another cake on top. Depending on your upgrades available in the shop, they may also order something else. Left-clicking on the item selects it; right clicking sends it to the customer. You can also click on the customer to send the item to them. Each customer starts out with a smiley face surrounded by a green timer. As they wait, the timer ticks away. Once the timer makes a round, the tip level decreases.
Each level is about 2 minutes.
Upgrades, called "fittings" are unlocked by a combination of available money and amount of tips earned. Upgrades include a coffee and a cappuccino machine; a cotton candy machine; three soda machines (cola, orange, and fresh, whatever the heck that flavor is - Fresca, perhaps?); three ice creams: strawberry, chocolate, and vanilla; two popcorns: sweet and salty; and three creams: peach, forest fruit (again, any idea what flavor that is?), and chocolate. The player must balance spending money for the fittings and towards building a house. As Emily gets depressed, building the house pumps up her attitude. The better her attitude, the more patience the customers have.
The trick is to make sure you keep all the upgrades filled.
What they did well: Towards the end, it did get difficult to manage all of the upgrades. Having the house building impact her attitude was a different and interesting take. It was easy to see the patience level of the customer and how much time you had left to serve them to get the best tip.
What could've been better: Overlooking the weak story design (why would a college graduate fly somewhere to manage a cake shop?) and weird character movements (really, just drag the image across a screen and have her flip her hand out for a taxi), Cake Shop was mostly just a time-waster. I didn't get any rewards out of playing it. Graphics were very low end and the music was repetitive. Speaking of repetitive, how about having to click through the same dialogue any time I wanted build something on the house? Additionally, it would make more sense for her attitude to make her a slower waitress, rather than affecting the patience levels of the customer. I encountered a pretty major bug when deleting a name. The screen and computer freeze. Behind the full-screen game is a Windows text box, asking if I am sure I want to delete that file. Once you click OK, you can go back to the game or close the game.
Overall, if this had been designed by a set of first year game students, it would be passable. Since it's not, I'd only recommend it for kids, who might not notice all the glaring issues.
Tuesday, October 14, 2008
Cassandra's Journey: The Legacy of Nostradamus
Cassandra's Journey: The Legacy of Nostradamus brought to you via JoyBits, is a mostly hidden-object game.In addition to the levels, there are 3 "divination" games that are unlocked via progressing through the story. They are unlocked at levels 4, 13, and 20.
The story is that a woman comes to you, Cassandra, who has recently started her divination business. She wants to find her brother. You have inherited your grandmother Serena's sense of fortune-telling, but need additional help from Nostradamus' ring. You start to have a vision of him, which oddly starts out with him IMing you.
There are two gameplay options: timed or relaxed. Like most hidden object games, there are penalties for random clicking (30 seconds), and hints that can be collected throughout the levels. There are blue, red, and green gems, which are banked as points. You spend the points on one of 3 items to help locate: a wand that glows brightly when lit (2 points), a general area highlight (1 point), or an object locator (3 points). The points add up quickly so if you want to be a lazy player and not look hard, there are lots of opportunities to acquire and use the hints. However, you get a time bonus and bonus points for not using jewels and/or hints, so to maximize your score, you want to use as few as possible.
There are other puzzle types: click to place the tile; "fix" something in the hidden object screen (reassemble a pizza; a building roof), match 3 to get a key and jewels, a semi-crossword, etc.
What they did well: The intro music was nice. It does have multiple types of puzzles to solve. They use the gamut of hidden object lists: riddles, puzzle pieces, lists, outlines. For their find-a-difference puzzles, there were 3 pictures instead of two, which made it slightly more challenging. They also used crosswords and match-3.
What they could've done better: First, proof-read. The text has quite a few glaring spelling errors. Plus, the conversations made little sense and the characters were less than believable. I'd prefer you not give me characters and text to read unless it really means something. Level 11 was very annoying to me, because you really don't do anything. The circles around the find the difference scenes made it difficult to detect the last few differences because the circles were so large. The book to start each level has even and odd pages. The odd pages automatically updated the picture to the left, which you could click on to start. In order to access the even pages, you had to physically click on the page on the book, then the picture. I encountered a bug that made a ticking sound loop over and over. Closing and restarting the game fixed the problem, but it happened more than once. Each divination can only be accessed once a day. There were a few random, odd voice-overs. I was very disappointed in the "magic tricks" which were glorified logic puzzles, optical illusions, and puzzles that have been passed around in e-mails for a long time.
Overall, it was not a very solid game, but kids and fans of hidden object games who want to play all varieties might enjoy it.
Hints (spoilers):
On the first find a difference:
Crow, bunny, pizza, scarf, sandwich on table, chair placement, sunglasses on head, picture (red shirt), photographer's bag
Words in crossword:
page2: forune, that, grandmother, magic, guess
page 3: Ring, help, have, mission(6)
page 4: greatest, talisman, with, thing
Chapter 13 find-a-difference:
chair, chick, banana, gramophone, postman, leaf, basketball, cactus, crow tag, small picture on board
Saturday, October 11, 2008
Diner Dash: Seasonal Snack pack
Diner Dash: Seasonal Snack Pack is another in the very popular time management Diner Dash series brought to us by PlayFirst games. Try them all for free at Big Fish Games:Diner Dash
Diner Dash Flo on the Go
Diner Dash Flo on the Go
They even created a version for kids:
SpongeBob SquarePants Diner Dash
Diner Dash: Seasonal Snack Pack is not for the faint of heart, and not for people who are new to the Diner Dash series: it gets up and running very quickly!
The player joins Flo and her Grandma for fun and excitement waiting tables at 5 new restaurants: it starts out at Coral Cover Cafe Waterpark (summer). All of the customers from previous Diner Dash games make an appearance, with all of their little peculiarities. The businesswomen like to be served fast. They don't like noise. Bookworms are slow to order and eat, and have more patience, but they don't like noise. Cell phone guys don't mind noise, and they are also impatient. Families don't mind noise and are moderately patient. The girls don't like noise and are moderately patient. Tourists like to be served quickly once seated, and often want you to stop and take their picture. (I still hate that breaking my chains!) Fitness ladies don't mind noise and are moderately impatient. They rarely order dessert. Lovebirds are patient, don't mind noise, but their kissing annoys tourists, bookworms, cell phone guys, and the girls.
Points are gained for chaining together actions: taking orders, delivering food, picking up the checks, clearing the tables, delivering "extras" such as appetizers and desserts. The level of patience left is shown by the number of hearts under each table. Quick service earns hearts.
There are bonus items, which include drinks (serve to tables to improve their patience/hearts), a podium (talk to people while they are waiting to improve patience), flowerpots for a bonus when seating tables, and appetizers and desserts. Each person in the dining party has a specific color - that color can also earn a bonus, if you seat them in a matching same color seat. This is, as always, one of the best ways to earn points and gain expert level.
The story continues to four other restaurants (and 3 other seasons): the Crypt Cafe, Hometown Harvest, Winter Wonderland, and Romantic Rendezvous. (Don't you know Cookie would love it there.)
Unlike the other Diner Dash games, which gradually introduces characters, colors, and bonus items, the first two levels have the drink bonus, flowerpot bonus, and podium available. The customers and colors are varied. In level 3, the snack station is opened up. Level 4 gives desserts. By level 6, all of the customers are unlocked and so are the purple colored customers. It's quite a challenge!
As an FYI, when playing against a waiter/waitress to earn more points than they do, the biggest points are earned by seating groups (matching customer color to the seat, of course) and taking the check. Use these to your advantage. You also can get a bonus if you seat people at a table where you've placed a flowerpot...but be quick because the rival waiter/waitress will get the bonus if they seat people there!
What they did well:
The graphics are improved, and it combines all elements from the previous games. The story line is fun, and it is a challenge even for veteran Diner Dash players. The competition levels where you have to earn a certain number of points more than the other waiter/waitress are a lot of fun. It was fun to see all the different customer types come through the water park slide, and the other restaurants are all unique.
What could've been better:
The music. It's disappointing that there isn't more variation. Also, they expect that the player is familiar with the Diner Dash family, as they don't introduce the different customers and describe how to maximize points with them. I also wish they'd take the Crypt Cafe and had the customers dress up for the season.
Recommended for: fans of Diner Dash or time management games.

Monday, October 6, 2008
Restaurant Rush obession
Sorry it's been a while since I've updated the game blog, but I've been busy with the Restaurant Rush game. I got all the way to the 60th restaurant and got stuck, so I had to start all over.So my tip is to spend your money wisely on three things: recipes, jukebox music that improves patience by 40-50%, and at the Farmer's Market. Beef and vegetables are the best to upgrade, because they are used in so many recipes.
Sadly, one of my jukebox songs (for 50% more patience) got bugged somehow. Whenever I clicked it, the program crashed. Anyone else have problems with that or know how to fix it?
I ended up with the 3rd best option (not following my tips above), and am in the process of replaying the game. The bonus to finishing the game is that it allows you to start with the recipes you purchased in the first go-round. (Prices for tea and soup, along with all upgrades including the tea and soup machines, farmer's market and jukebox songs) start over. So I'm giving it another run through to get to the best ending.
More game updates soon, though!
Thursday, September 18, 2008
Cake Mania 3
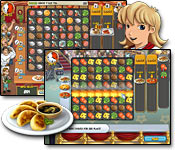
Cake Mania 3, a fun time management game from Sandlot games, builds on the successful Cake Mania franchise. In Cake Mania 3, Jill is about to get married to Jack (who you may remember from the previous game) when a time distortion ball breaks, sending her friends and family to different eras: prehistoric, ancient Egypt, the Ming dynasty in China, 17th or 18th century Paris, and perhaps the Shire.As in previous Cake Mania games, the purpose is to give a customer a menu, take the order, make the cake, ice it, garnish it (if you've unlocked that tool) and deliver it, trying maintain or improve the customer level of hearts (patience). Items to unlock include a phone, additional ovens and icing machines, a display case, a tea maker, and garnish tools. Other items include a phone to take cake orders over the phone, and shoes for swiftness. Of course, each of these can be upgraded. They are purchased with the profits from your days.
In each time scenario, there are different power ups to use. The prehistoric has a club that allows you to give any cake to the waiting customer. In Egypt, the Ra power-up extends the day. In China, the Tao of Cake (which is a phrase I may borrow for my own purposes) extends the patience (it doesn't give more, but holds the customers at their current heart level). In the Shire/Fairyland, the crystal ball will tell you what the next customer without a menu will order.
There is an additional powerup that is achieved either through making a specific cake or through strings of 3-series (3 menus, 3 coin collections, etc). This sugar rush makes all the tools (ovens, tea machine, icers, garnishers) produce instantly instead of having a timer. This is a fun element to manage!
In addition to gameplay, there is a sandbox area where you can create wedding cakes, save and send them as e-cards. This does not need to be unlocked, but can be accessed from the first play. A cartoon function will also be unlocked down the road. There are also mini-games on the map, where you have to make and package a certain number of cakes off a conveyor belt. You can earn extra money this way, as well as bonus power-ups.
What they did well: Cutscenes added voice-overs, a nice change of pace for a casual game! The text was witty and poked good fun (for example, Jill wonders why cavemen and dinosaurs are together). I played the first release of Cake Mania 2 and encountered several major showstopper bugs. This version seems much more solid. I found the controls worked better than in the previous games. The costumes for Jill were hilarious. Each customer "pays" with appropriate "coin" (i.e. chimps pay with bones, dinos with stones, etc.) That attention to detail is nice. The sandbox mode, the mini-games, and the save functions are all superb additions.
What could have been better: An explanation of why they had a time distortion ball in the first place. The Ra gift from Egypt didn't seem to add much gameplay value.
Cake Mania 3 is a big improvement over Cake Mania 2 and is a very fun time management game.
Recommended for: fans of the Cake Mania series, time management game fans, and those with a sense of humor
Subscribe to:
Posts (Atom)
