


Thursday, September 18, 2008
Cake Mania 3
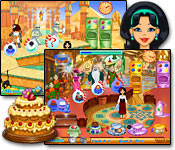
Cake Mania 3, a fun time management game from Sandlot games, builds on the successful Cake Mania franchise. In Cake Mania 3, Jill is about to get married to Jack (who you may remember from the previous game) when a time distortion ball breaks, sending her friends and family to different eras: prehistoric, ancient Egypt, the Ming dynasty in China, 17th or 18th century Paris, and perhaps the Shire.As in previous Cake Mania games, the purpose is to give a customer a menu, take the order, make the cake, ice it, garnish it (if you've unlocked that tool) and deliver it, trying maintain or improve the customer level of hearts (patience). Items to unlock include a phone, additional ovens and icing machines, a display case, a tea maker, and garnish tools. Other items include a phone to take cake orders over the phone, and shoes for swiftness. Of course, each of these can be upgraded. They are purchased with the profits from your days.
In each time scenario, there are different power ups to use. The prehistoric has a club that allows you to give any cake to the waiting customer. In Egypt, the Ra power-up extends the day. In China, the Tao of Cake (which is a phrase I may borrow for my own purposes) extends the patience (it doesn't give more, but holds the customers at their current heart level). In the Shire/Fairyland, the crystal ball will tell you what the next customer without a menu will order.
There is an additional powerup that is achieved either through making a specific cake or through strings of 3-series (3 menus, 3 coin collections, etc). This sugar rush makes all the tools (ovens, tea machine, icers, garnishers) produce instantly instead of having a timer. This is a fun element to manage!
In addition to gameplay, there is a sandbox area where you can create wedding cakes, save and send them as e-cards. This does not need to be unlocked, but can be accessed from the first play. A cartoon function will also be unlocked down the road. There are also mini-games on the map, where you have to make and package a certain number of cakes off a conveyor belt. You can earn extra money this way, as well as bonus power-ups.
What they did well: Cutscenes added voice-overs, a nice change of pace for a casual game! The text was witty and poked good fun (for example, Jill wonders why cavemen and dinosaurs are together). I played the first release of Cake Mania 2 and encountered several major showstopper bugs. This version seems much more solid. I found the controls worked better than in the previous games. The costumes for Jill were hilarious. Each customer "pays" with appropriate "coin" (i.e. chimps pay with bones, dinos with stones, etc.) That attention to detail is nice. The sandbox mode, the mini-games, and the save functions are all superb additions.
What could have been better: An explanation of why they had a time distortion ball in the first place. The Ra gift from Egypt didn't seem to add much gameplay value.
Cake Mania 3 is a big improvement over Cake Mania 2 and is a very fun time management game.
Recommended for: fans of the Cake Mania series, time management game fans, and those with a sense of humor
Wednesday, September 17, 2008
mystery chronicles: murder among friends
Mystery Chronicles: Murder Among Friends is a hidden object game from Lazy Turtle Games.The setting is France, around the turn of the 20th century. Your cousin and wife were killed, and their butler and children are missing. It's your job to solve the crime. You have the option of playing in either the relaxed or the timed mode. Each chapter starts with 45 minutes on the clock. As with all hidden object games, there is a list of items to locate, and a hint to help. In this case, it's a magnifying glass. Clicking on it highlights one object still unfound on the screen. It takes 2 full minutes to recharge. There are multiple scenes in most chapters, and clicking on the footprints in the lower right hand box opened up the additional scenes, in case you get stuck and want to move on to finding something else.
I found I had to click seven times in quick succession before I encountered a time penalty (30 seconds). However, slow random clicks did not seem to have any effect. There are no bonuses for locating multiple objects in quick fashion.
What was done well: mini-games intersperse the hidden object scenes. You may have to play a game similar to minesweeper or piece together paper fragments, as examples. The story was intriguing. Items frequently looked the same from scene to scene (i.e. the brown briefcase you collect from the first location of the Mansion will be the same brown briefcase in other scenes as well).
What could have been better: I found the objects frequently blended in with the background. For example, in the first location, the mansion, the bullet hole in the window was difficult to locate. In the garden, the coffee grinder in the weeds was impossible for me to discern. There was no way to magnify an area, which contributed to my frustration in locating blended objects. Occasionally, there were items that I had not heard of (i.e. Hanoi tower - the ring tower). Many of the items to find had nothing to do with solving the mystery. In one scene, there is clearly a dead body. Clicking on it prompted no action. It wasn't until the end of the scene that you "discover" the body in text. That was too contrived for my tastes.
Recommended for: hidden object mystery fans

Monday, September 8, 2008
School House Shuffle
School House Shuffle is a time management game, where you create a school and attempt to turn the kids into geniuses. Ms. Brighton, who is the school principal, talks like Charlie Brown's teacher.The levels start slowly, with one grade at a time. The grades are distinguished by hair color. The second grade starts at level 7. This is a school that you and I probably would wish we had attended. When kids get hungry or need to go to the bathroom, they get dismissed to the cafeteria or to the restroom.
To help corral the kids, the player starts with a hall monitor (if a kid passes within his range, (s)he will go back to class) and a chaperone (get it close enough to the kid and the kid will follow the chaperone). Money is earned as kids learn and at the end of the day. There is a bonus if the class performed well enough to earn an A. (Note: if there is a way to earn an A on the first two levels, I was unable to figure out the appropriate strategy.) The money purchases upgrades (faster restroom/cafeteria breaks, better classrooms for faster learning; additional staff to help with control the children; aesthetic improvements to the school).
What they did well: the music is good. It has several different themes: one that reminded me of the Incredibles; another that was very swing-style, and a third that made me think of Jerry Lee Lewis. I liked the personalization of the profile screen, where the player gets to name the school and pick a favorite class. The school name shows up on the play screen as well, which was a very nice touch. Also, the paper that was the background for the summary sometimes had some funny non-sequiturs. The gym, which reminded me of a hamster ball, was amusing.
What could have been better: Controls. It was difficult to click on the kids/monitor/chaperone/janitor, especially when the kids were in the gym. I would send a kid to the cafeteria to get something to eat, then click on the janitor to repair something. All of a sudden, I'd notice the kid was wandering off and not going to the cafeteria. That was pretty frustrating. For many parts of the game, I was waiting for something to happen. It was worse in the early levels, but even in the more advanced levels, I sometimes had nothing to do. It didn't make sense that the principal would be disciplining the classes, which acted up multiple times in the day. Each time she disciplined them, this annoying pop-up message would appear. Also, apparently the staff is not the cream of the crop, as they doze off and the principal must discipline them too.
I have to say that I was disappointed in the execution of this game. I expected it to be much more fun and enjoyable than it was. Instead, playing through felt a little bit like torture.

Sunday, September 7, 2008
Home Sweet Home 2: Kitchens and Baths
Home Sweet Home 2: Kitchens and Baths is the second game in the Home Sweet Home series. As in the first game, it's a home decorating sim, except the focus is now kitchens and bathrooms, whereas the first one centered around living rooms.There are two phases to each level: the decorating and then the building. For decorating, you start with a room - sometimes the room has stuff in it, sometimes it's pretty bare - a budget, and what amounts to a word puzzle. The clients are never quite specific about what they want: it's always caged in a descriptive form. For example, one level will have a movie star telling you he will have 2 of his dudes over and they would bring a friend and he needs a place to chill. The player must interpret that as needing to use 5 chairs in the room to make the maximum score. The goal is to meet the customer desire, within budget. In order to move on to the build phase, a minimum customer satisfaction level must be met and all items must be placed (most levels require a minimum number of things to be built). If you can't figure out what the customer wants, there are hints available.
In the build phase, you have 3 workers (you might recognize them from HSH 1!) to help you build out the room in a specific number of days. There are power-ups, where an item will flash the worker's color. Placing the worker on that item will result in them building faster. Coffee is also available, which perks up the worker and prevents them from getting hurt (and slowing down the process). Occasionally, the workers will stop and ask for a tool that the player must find in the toolbox.
The level score is determined by the customer satisfaction (up to 1000 points), whether the player used a hint (not using a hint gives a 100 point bonus) and a build score for achieving the goal in the number of days. 3 medals are awarded: bronze, for reaching 1400 points, silver for 1700 points, and gold for 1900 points. Each level also unlocks 2 items which the player can use to decorate a bonus personal apartment.
What they did well: it's an enjoyable sim. There was never any point at which I felt stressed. Moving items from one place to another was easy, and it was nice to be able to recycle materials. The build levels were sometimes quite challenging, keeping the workers injury free, motivated, and getting all the items built. New items unlock all the time. The word puzzles are fun to decipher. Wall colors are rich and full.
What could have been better: The graphics on the level-choosing screen. It wasn't always immediately obvious which was the new level (sometimes you design rooms for the same client). I was able to make some very odd bathroom and kitchen arrangements. For example, there were some kitchens that lacked a refrigerator and/or a sink. A few bathrooms were missing a toilet. I was still able to get the gold score for that level, though. That seemed odd. Also, there was no penalty for placing items that made the customer unhappy. So a player could spend a lot of time in trial and error and still get a high score. Personally, I would've appreciated more of a challenge (i.e. sale price of placed items is half the value, etc).
Recommended for: fans of decorating shows, or Home Sweet Home

Tuesday, September 2, 2008
Azada Ancient Magic Walkthrough
Technically, this is not a game review, but the feedback I've received is that people would like a walkthrough. This contains spoilers, so please only read through as a last resort. Happy puzzling, everyone!The Fairytale:
You have to rescue Rapunzel from her tower prison. There is no way to get up there from the first page. Click on Rapunzel and take the 1 blue shutter. Place it in your bag.
Page 2: Navigate through the maze to pick up wood on the right hand side and the second shutter, which is in the middle
Page 3: Open the door for the little pig’s household.
Page 4: Take the candle.
Go back to Page 3. Place the wood in the fireplace and use the candle to light the fire to smoke out the wolf. When he leaves, so will the pig. Take the key and the muffin along with the ladder.
Page 4: use both of the shutters on the ladder maker’s window. Open the window and collect the second ladder. Feed the wolf the muffin. Use the key to unlock the cupboard and get the card.
Return to Page 1. Use one ladder for the lower level, one for the second level. Rapunzel is free. Give her the card.
The Castaway:
You’re helping Robinson Crusoe.
Page 2: take the handkerchief (checked cloth on tree).
Page 3: Pick up the shovel head on the ground and the fishing pole on the LH side of the screen near the green snake.
Page 4: Take the rock on the bottom of the page and the machete leaning against the tree.
Go back to Page 2 and use the machete to chop the tree branch. Collect the tree branch. Use the hankie on the shovel head and connect to the tree branch.
Go back to page 3 and dig in the soft spot to uncover the crystal. Take the crystal.
Go back to page 1 and put the crystal in the machine. Light up all the mirrors. Use the fishing pole to get the bottle in the water, then break it with the rock. Give Robinson his card.
The Ghost:
Restore the room as it used to be. Close the door. Put pillow back on the couch. Place the books under the sofa on the middle-most shelf.
Page 2: take the blue paintbrush. Assemble the picture.
Page 3: take the egg and the statue. Open the cabinet by fitting blocks. Take the necklace and the card from the drawer that opens.
Back to page 1. Place the statue on the table, the board on the wall, the necklace on the Asian statue, and the egg on the edge of the bookshelf. Place the painting in the empty frame and the paintbrush in the holder on the middle shelf on the bottom.
The Secret Garden:
Page 1: Open the window. Pick up the clothes on the chair and put them on Colin. Notice the robin outside the window.
Page 2: pick up the watering can.
Page 3: Take the trowel in the sand, the pruning shears by the water, and the whistle off the pump handle. Fill the watering can by placing it under the pump and clicking the pump handle.
Page 2: Whistle to the robin, who will come and eat the worm. Dig with the trowel to uncover seeds and a key. Prune the ivy with the shears. Use the key to unlock the gate.
Page 4: Now uncovered after opening the gate. Use pruning shears in the overgrown garden. Take the twig from the right hand corner. Put seeds on the flower bed and water them with the full watering can. Solve the puzzle by placing the correct number of flowers around the circled number. Whistle at the robin, who will go to the tree. Give the twig to the robin, who will build a nest. An apple will appear. Take the apple.
Go back to page 1 and give Colin the apple. He will leave. Move the cover over the painting and take the card.
Go to page 4 to meet Colin in the Secret Garden. Give him the card.
The Timeline:
Page 1: take the Coat of Arms
Page 2: Solve puzzle by raising/lowering the ball. Hint: the blue star will make the ball jump from one blocked side to the next. After opening, take the wine jar from the drunk guard. Place the Coat of Arms above the gate.
Page 3: Take the head of Horus. Go back to Page 1.
Page 1: dig in the soft spot. Place the bottle of wine in the hole. Cover up the bottle.
Page 3: dig in the soft spot. Uncover the wine, which is now vinegar. Take the bottle of vinegar.
Page 2: clean the plaque using the bottle of vinegar. Place the head of Horus on his body. Use the pattern of the eyes to click on the left or right eye. Doing the correct pattern will unlock the card from the sphinx’s mouth. Give the card to the Voyager.
The Vampire:
Page 1: Take crowbar by the locked door on the right hand side of the page. Use it to remove the barricaded window on the castle on the opposite page.
Page 2: take the rag hanging from the rack, and place it on the lid. Cover the steaming pot with the lid. Take the knife from behind the steam. Unlock the poison door, and take the cloves of garlic.
Page 3: open the curtain. Turn the clock on the mantle to daylight hours. Take the garlic and give to Dracula. He will move to the light and go away. Open the journal with the knife and take the card inside. Also take the key on the table.
Page 1: use the key to open the gate and give Jonathan Harker his card.
The Treasure:
Page 2: take the Jolly Roger flag and place it on the mast. Take the two matchsticks and light them on the candle.
Go back to page 1, and get the Key from Long John Silver.
Return to page 2 and open the small box. Take the pieces of eight.
Go to page 1 and hand the bird the pieces of eight. He will fly away and gunpowder will be below. Put that and the cannonball (to the right of the cannon; a little difficult to find) in the cannon. Light the cannon with one of the matches and point at the landslide. They will be blown away.
Page 4: use the last matchstick to light the lamp in the middle of the room. Open the book, which has a map and the card. Take the shovel.
Go to Page 3, where Long John Silver is now. Give him the map, and the X will mark the spot. Dig with the shovel. Solve the puzzle and give him his card.
Headless Horseman:
Page 1: take the crowbar.
Page 2: Take the Shovel. Use the crowbar on the locked door, which will open up a pattern on the side of the mausoleum. Open up the 3 tombstones with symbols on them and press the symbols in the correct order. They will remain lit up if you are pressing them properly. If you mess up, start from the beginning. You will get a card from a skeleton.
Return to Page 1. Use the shovel to remove the moon from the tombstone.
Go to Page 3 and place the moon on the crypt. It will open. Get the skull. Tip for the moon mini-game: the moons stop growing as soon as they hit anything (a side of the box or another moon) so make the first ones as big as you can.
Go to page 1 and give the headless horseman his head and card.
The Descent:
Page 1: click book for a secret note. Use the magnifying glass on the desk to read. Earn a cryptex by matching stones as part of a mini-puzzle. Take the matchbox, fishing pole, mirror, runes book, Latin book. Open the note again and decipher it by placing the items in this order: runes – cryptex - mirror – Latin. Give the note to the professor.
Page 2: take the gunpowder, pickaxe, and rope. Use the pickaxe on the stump to get grubs.
Page 3: use the pickaxe on the strange-looking trees. Use the rope to lash them together to make a raft. Put grubs on fishing pole and capture strange fish.
Page 4: Feed fish to dinosaur. Put the gunpowder against the wall and light with the matchbox. Take a picture of the Professor to get his card.
The Dive:
Page 1: Take the cog from the shark’s mouth, swimming in the background.
Page 2: underneath, take the dry coal, the wrench (under wood). Use to open the hatch. The top part of the page will drain. Can now also pick up card after draining the hatch. Open the furnace and remove wet coat. Replace with the dry coal. Push red button and play the mini-puzzle. Pull the lever.
Page 3: Take the pearls from the oysters. Place the cog in the RH side page where it says it’s missing a part. Pick up the stone disk and go back to Nemo on Page 1.
Page 1: play the stone disk on the turntable. It will give the pattern: 3,4,1,2.
Go back to page 3. Play the pattern on the symbols (hint: they are numbered 1,2,3,4 in ascending order.) It will open up and give you a card and a medallion. The medallion is missing a pearl. Place one of your pearls inside.
Return to Nemo on page 1. Give him the medallion and the card.
The World of Oz
Page 3: Take the axe, the oil, the magnet, wood, and board.
Go to page 2 and oil the Tin man. Guide him through the maze, using the wood and board to get him over rough spots. Chop down trees in the way with the axe. He only travels in a straight line, so use the magnet to turn him. Get the card and the slippers.
Go back to page 1 and give Dorothy her slippers and the card.
The Witch:
Page 1: Take the bread paddle by the oven.
Page 2: take the burlap sack and bucket. The witch won’t let you take anything else at this time.
Page 3: Play the mini-game to trap the chicken. (hint: use your light to make it go into the center where it can’t escape).
Page 2: Give the chicken to the witch. She’ll tell you to put it in the pot. Return to Page 1 and fill the bucket with water from her well. Go back to Page 2 and put the water in the pot and stoke the fire. The kitchen will get steamy and the witch will leave. Move quickly! Get the bread from the table, click the book and take Gretel’s card, the key from the wall left of the oven, and the chicken bone from the chicken on the table. If the witch returns before you’ve gotten all four objects, go back to the well and fill with bucket with water and repeat.
Page 1: Make sure the witch isn’t outside (she will be if the kitchen is too steamy). If she is outside, flip to page 2 and then back to page 1. Give Hansel the chicken bone. Fill the bucket with water again. Return to page 2 and steam the kitchen. The witch will go outside.
Return to page 1. The witch will check Hansel’s finger and think he’s still too skinny. Put the bread on the bread paddle and into the oven. When the witch goes to check on it, hit her with the bread paddle and she’ll be stuck inside. Pick up the breadcrumbs on the ground and use the key to free Hansel.
Go to Page 3, and use the bread crumbs to call the swan. Give Gretel her card.
The Detective:
Page 2: Open the right desk drawer; take the pen. Click on the safety-deposit box and get fingerprints.
Page 3: Collect a footprint from the floor. Get the ice pick by the sink. Take the footprint from your inventory and compare it to the engineer’s boot. He’ll turn around. Use your fingerprint from your inventory to compare to his hand. He’ll leave. Take the wrench from the tool box.
Return to page 1 and give Sherlock the footprint and fingerprint samples.
Go to page 4 and take the mail container on the right of the desk. Click on the paper below the headphones to play a mini puzzle. It’s a cryptogram and the solution is “Package on ice retrieve at port”. Look on the left hand side of the desk at the requisition paper to see who requested ice. Use the pen to check the requisition by ice. Put the requisition form inside the mail container. Use the wrench to remove a part of the pipe next to the mail slot.
Page 2: use the pipe piece to repair the broken mail system. Put the mail container inside the mail slot. Click the lever and send the container.
Page 3: the necklace is encased in ice in the kitchen. Use the ice pick to free the necklace. Take the necklace back to Sherlock.
Page 1:Give Sherlock the necklace. He’ll give you a key.
Return to Page 2: open the corresponding safety deposit box (#13) with the key to get the card.
Return to Page 1 and give Sherlock his card.
The Gold Rush:
Page 4: wait for the miner to put down his pickaxe. Move fast and grab it!
Page 2: use the pickaxe to break into the box on the wall and get the keys. Open the cell door with the keys. Pick up the dynamite.
Go to page 3 (the bank) and use the dynamite on the safe. Take the key and card. Use the key to open the drawer. Get the deed from the drawer.
Go to page 4 and give the miner his deed. He will give you 1 gold nugget. You have to play a mini-puzzle to get the second piece.
Return to page 1 and give Buffalo Bill the gold pieces and his card.
The Traveler:
Page 2: Unplug the fan. Get the code from the fan. It will not go into your inventory, so write the code down. (85709). Click the cube and play the mini-game. Take the card.
Return to Page 1 and use the code to open the time machine. Clicking on the machine shows you need a handle and a power source.
Page 3: Take the sphere. Unlock the drawer by making the rows/columns match the side tallies. Take the handle and sphere to Page 1.
Page 1: Attach the handle and sphere to the time machine. Give the Traveler his card.
The Strange Case:
This involves Dr. Jekyll and Mr. Hyde. Each of the pages has two sheets: one that is active when Dr. Jekyll is around and one when Mr. Hyde is around.
Page 1: Dr. Jekyll needs snapdragon, salt, and phosphorous to make a potion. Locate the switch potion on his desk and take it into inventory. Give this to Dr. Jekyll to make Mr. Hyde appear.
Go to Page 2: (this is a small office) Take the crowbar and open the wooden crate with the crowbar. Take the phosphorous.
Go to Page 3: (hotel reception) Take the pen from the desk.
Go back to Page 1. Give Hyde the switch potion. He returns to Dr. Jekyll. Take the paper on the desk and trace his name.
Go to Page 2: (pharmacy). Give the pharmacist the paper. He will give you snapdragon.
Go to Page 3: (hotel room) Click on the nightstand and use the pen check the box for dinner.
Go back to Page 1. Give the switch potion to Dr. Jekyll.
Go back to Page 3: (hotel reception) Give the clerk the dinner order.
Go back to Page 1. Give the switch potion to Mr. Hyde.
Go back to Page 3: (hotel room). Take the salt off the dinner tray. Click the nightstand and use the pen to place a laundry order.
Go back to Page 1: Give the switch potion to Dr. Jekyll.
Go to Page 3: (hotel reception). Give the laundry order to the clerk.
Go back to Page 1: Give the switch potion to Mr. Hyde. You can place all 3 ingredients into the test tubes and play the mini-puzzle. Get the reflux potion.
Go to Page 3: (hotel room) Take the key out of the pocket from the laundry.
Go back to Page 1. Give Dr. Jekyll the switch potion.
Go to page 3 (small office) Use the key to open the drawer and remove the card.
Page 1: Give Mr. Hyde the switch potion. Give Dr. Jekyll the reflux potion and his card.
The Voyage:
Page 1: take the 3 weights off the balloon, and the bell off the ground.
Page 3: Attach the bell to the top right of the door. Ring the door bell. The valet will stick his head outside. Quickly go back to Page 2, inside the club room.
Page 2: play the mini puzzle to pop balloons. Hint: the balloon with the 3 | | | will shoot 3 balls – use it to point to the balloons below. Earn two coins from winning that. The valet will be back. Go back to Page 3.
Page 3: talk to Newsboy. Buy both of his papers with your two coins. Get the papers and a card. Ring the bell again.
Page 2: Get the watch off the shelf and light the newspaper on fire in the fireplace (if the valet comes back, just keep going back to Page 3 and ring the doorbell until you’re finished)
Page 1: Talk to Phileaus Fogg. He’ll ask you to light the balloon. Do that with the flaming newspaper. Give Phileaus the watch and the card.
Invisible man:
Page 1: Read journal for ingredients. Need original potion, crow feather, boiled egg, pinch of salt, and tree bark. Take the bread off the table.
Page 3: Knock on the door. When the proprietor comes to the door, go back to Page 2.
Page 2: take the meat grinder, the boiled egg, pinch of salt, and the card. If he comes back before you can grab all these things, keep going back to Page 3 and knocking on the door.
Page 3: use the meat grinder on the bread to get breadcrumbs. Place the crumbs in the bird feeder. A crow will drop a feather. Pick up the feather.
Page 4: (lab) Pick up knife. Play the mini-puzzle to get the original potion.
Return to Page 1 and add all ingredients to the option. Give to card and potion to the invisible man.
The Baron:
Page 2: Do the cog puzzle, and take the hearing aid from Selenite.
Page 3: Take the mirror frame on the ground.
Page 1: click the chest behind the Baron. Put the hearing aid in the hole. Turn the dials until you see a “click”. Take the portrait and place it in the mirror frame.
Page 3: Trade out the mirror fro the portrait frame. While the Vulcan is looking at the portrait, take the card from his hand.
Page 1: Put the mirror in the hole in the barrel in the water. Click the mirror until it is reflecting light.
Page 2: Use the device by pushing the red button. It will fire 3 bursts of lasers.
Page 1: Return to the Baron. Give him the card.
The Legend:
Page 1: Read the book. You need a sprig of rue, magical water, and a moon beam for the potion. Collect the firewood, prism, and vial.
Page 2: fill the vial with water from the magical lake.
Page 3: Take the dagger off the table. Place the prism on the ritual table.
Page 2: Use the dagger to cut off the rue branch.
Page 1: use the firewood to stoke the fire under the cauldron. Add the rue and the water. Take the deliverance potion
Page 3: give the potion to Merlin. He’ll vanish.
Page 2: Go back to the lake area. Merlin needs his staff.
Return to Page 3: pick up Merlin’s staff by the tree where Merlin was detained.
Page 2: Take Excalibur from the Lady of the Lake when Merlin calls her forth. Give Excalibur to Arthur. Give Arthur his card.
The Creature (bonus book)
Unlock The Creature by going to the portrait of Titus and entering the code “Magic Book”.
Page 2: Collect all the body parts. Solve the mini-puzzle to open the machine and get the card. Collect the lightning rod and the extension cord. Place the lightning rod on the tower on the opposite page.
Page 1: Attach the body parts similar to a jigsaw puzzle. Open the window. Connect the extension cord from the one outside to the one hanging from the ceiling.
Return to Page 2. Watch the lightning strike
Go to Page 1. Give Dr. Frankenstein his card.
The Genie (Last book):
Go to Page 4. Take the oily rag. Play the mini-game and light the fuses to make the freezer work.
Go to Page 3. Get the hammer off the floor and the wrench next to the stairs. Light the rag on fire from the furnace.
Page 1: Put the burning rag on the Genie. Take the compass on the right. Take the box in the stairway. Open the vase and get one part of a card. Keep using the burning rag to subdue the Genie as often as needed.
Page 2: Use the compass in the circle. Direct the ball through the labyrinth with your mouse (hint: use the compass for directions!). You’ll get the second card piece for this.
Page 4: Open the freezer door. Put the box inside the freezer. Use the hammer to break the frozen lock. Open the box – collect the third card. They will fuse together.
Page 1: Give the card to the Genie and he will be banished….or will he?
Subscribe to:
Comments (Atom)
